
Setting up Custom Properties
Fluid includes a core set of first-class properties across its different entities — such as projects, boards, schedule tasks, and user records. These built-in fields cover the essentials, but every organisation has its own data and reporting needs.
Custom properties let you extend this framework by adding your own fields to any supported entity. Whether you need to capture internal classifications, governance indicators, resource attributes, or workflow-specific details, custom properties give you complete flexibility to model the information that matters to your organisation.
This article explains how to create, configure, and manage custom properties in Fluid so you can align your setup with your organisation’s taxonomy, processes, and reporting requirements.
Creating a Custom Property
Application Administrators can create custom properties from the custom property management page in the Administration Console.
To create a custom property:
Open the Administration Console
Click on your avatar in the top-right corner of the screen.
Navigate to Data Administration → Custom Properties.
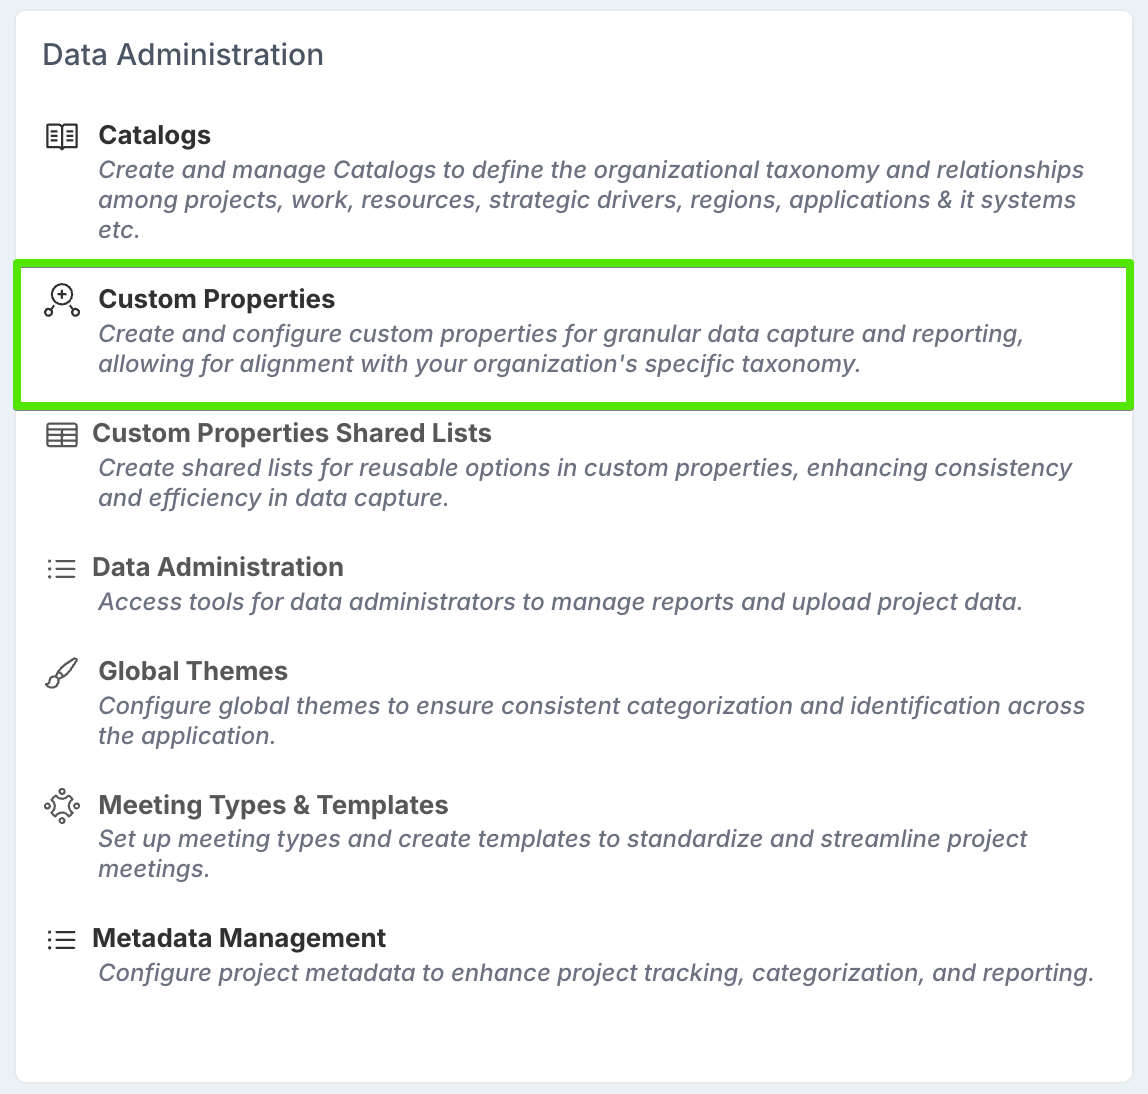
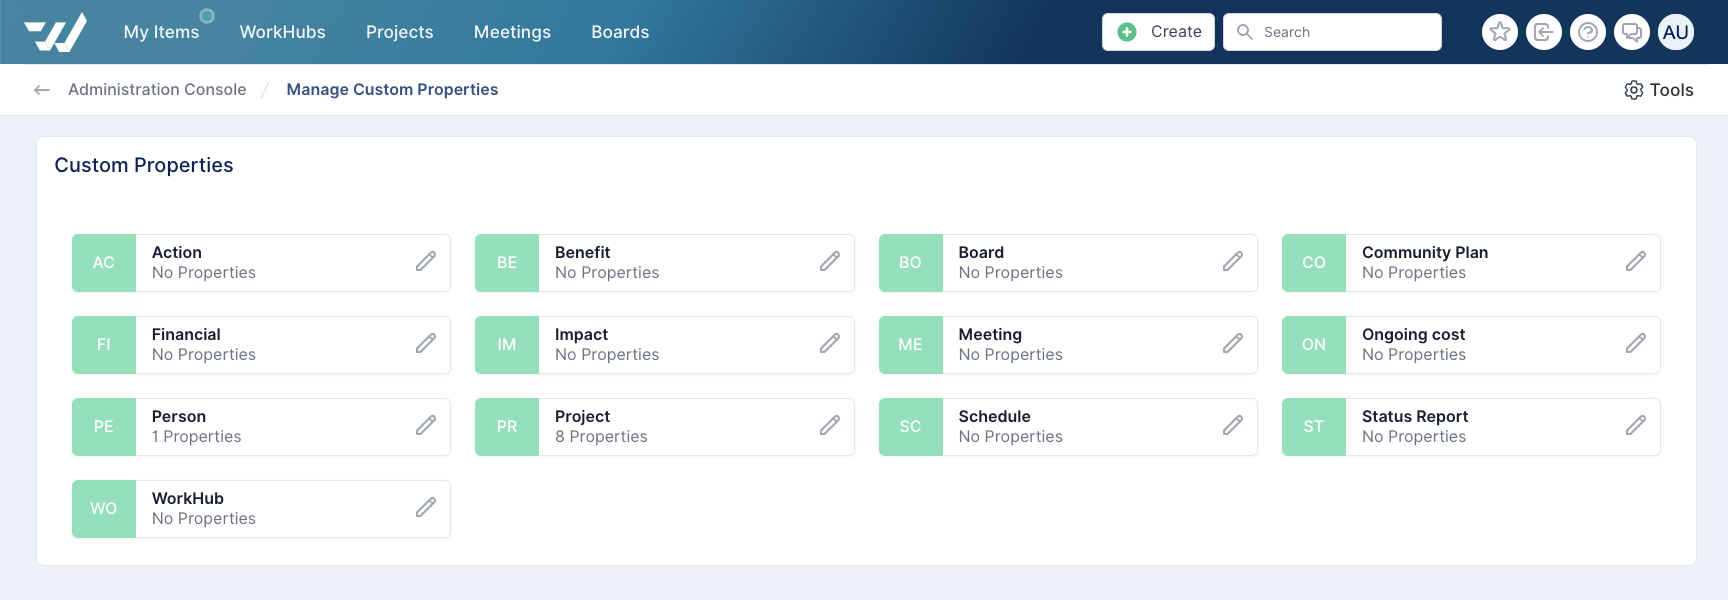
Choose the entity you want to add the property to.
Custom properties can be added to almost any element in Fluid, including Projects, Users, Impacts, Schedule Tasks, Resource Allocations, and more.
Add or edit a property
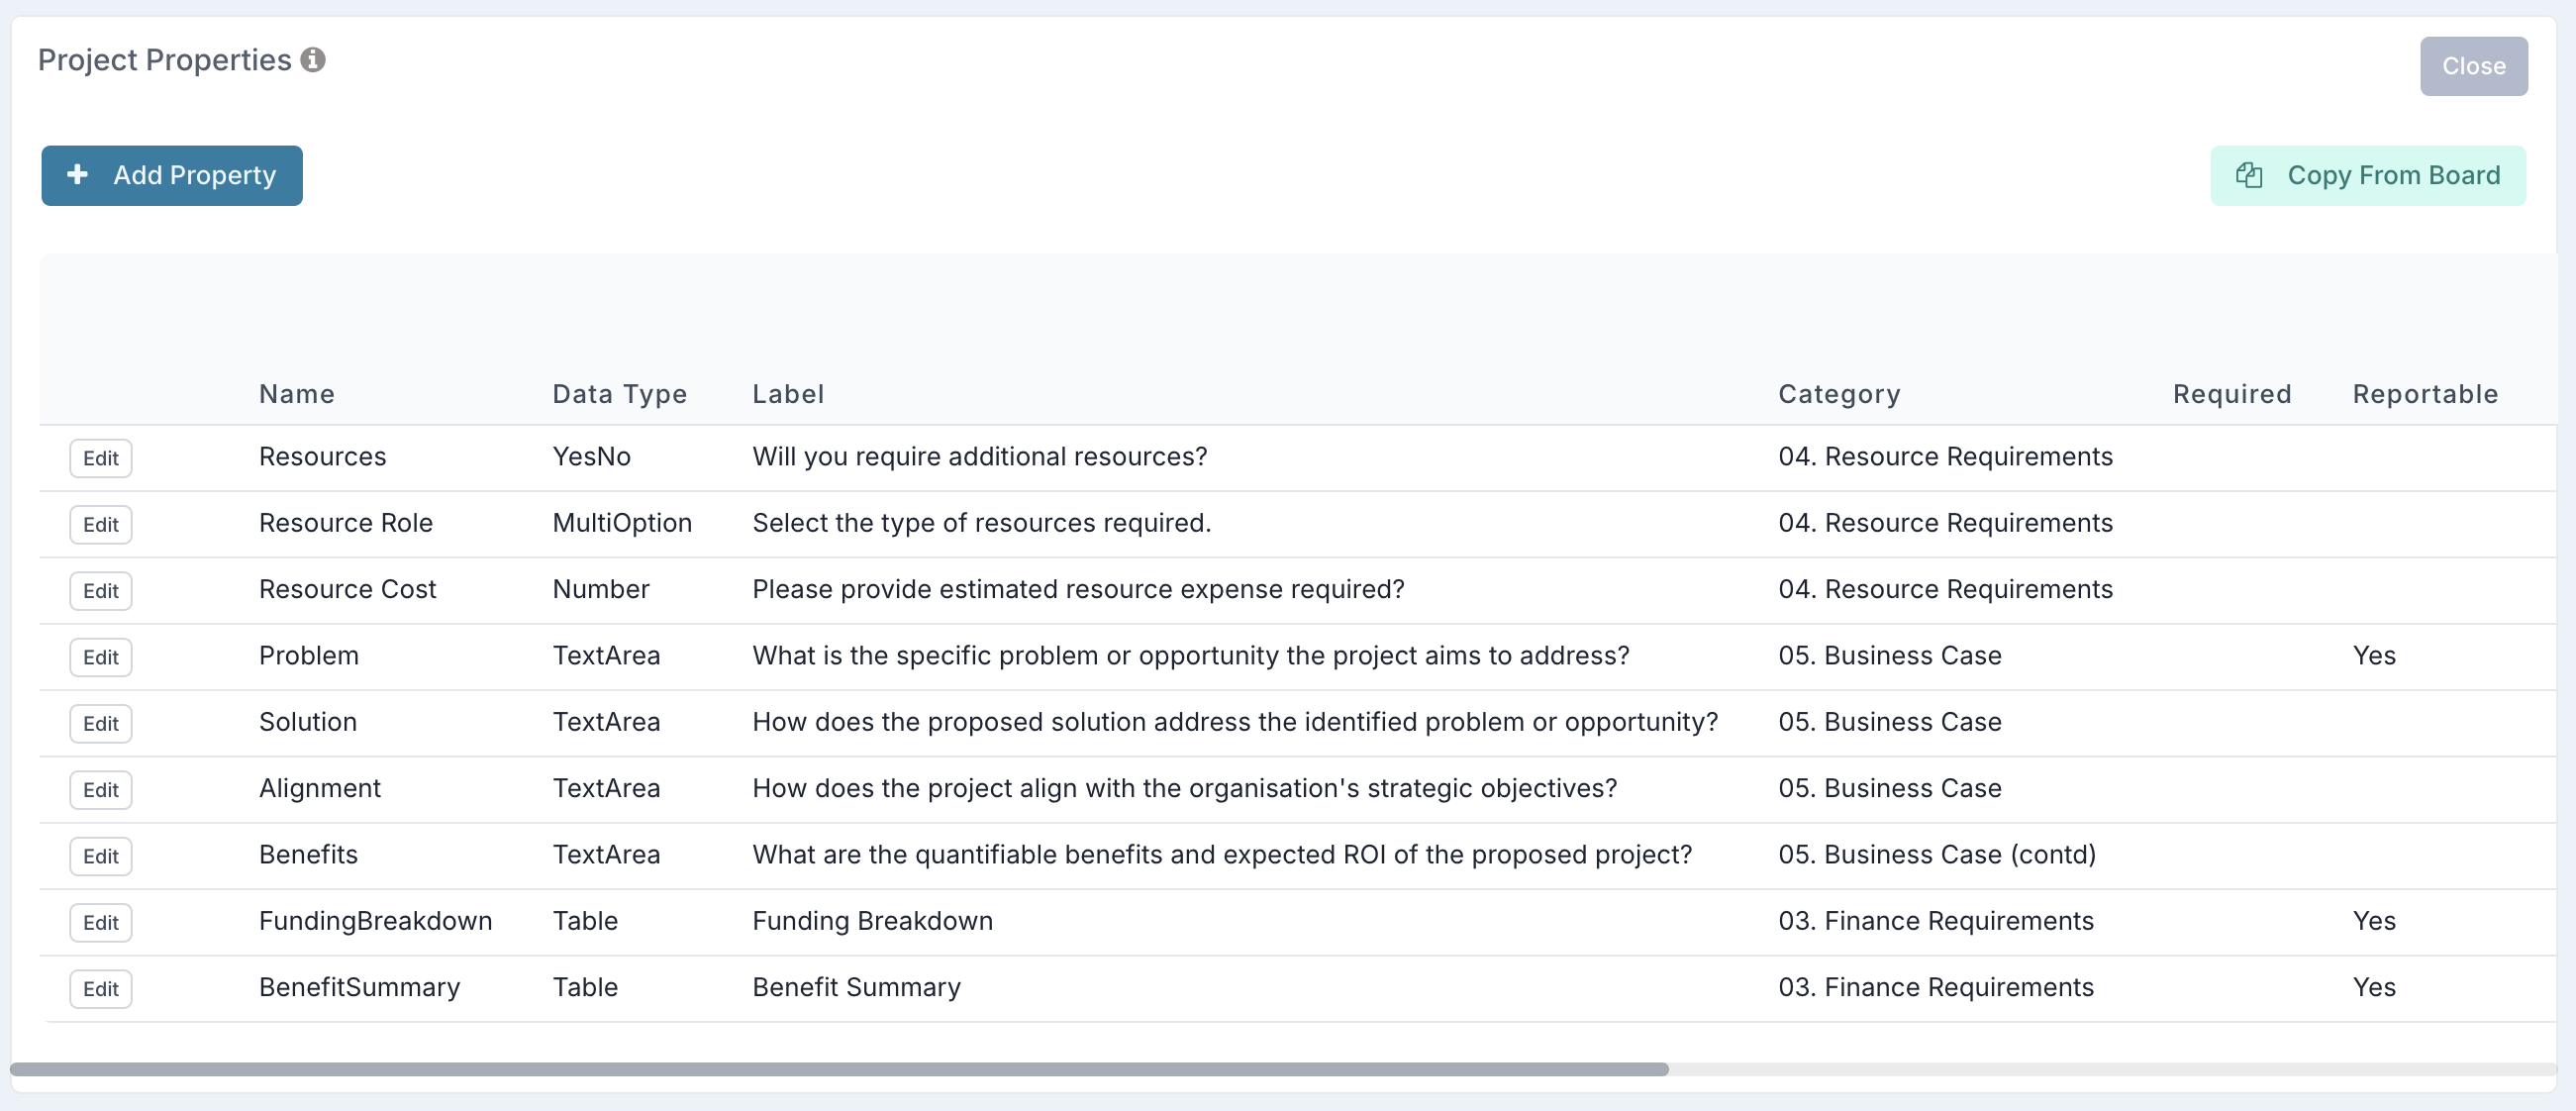
Click Add Property to open the configuration dialog and create a new property.
To update an existing one, click the pencil icon next to its name.
Complete the property details
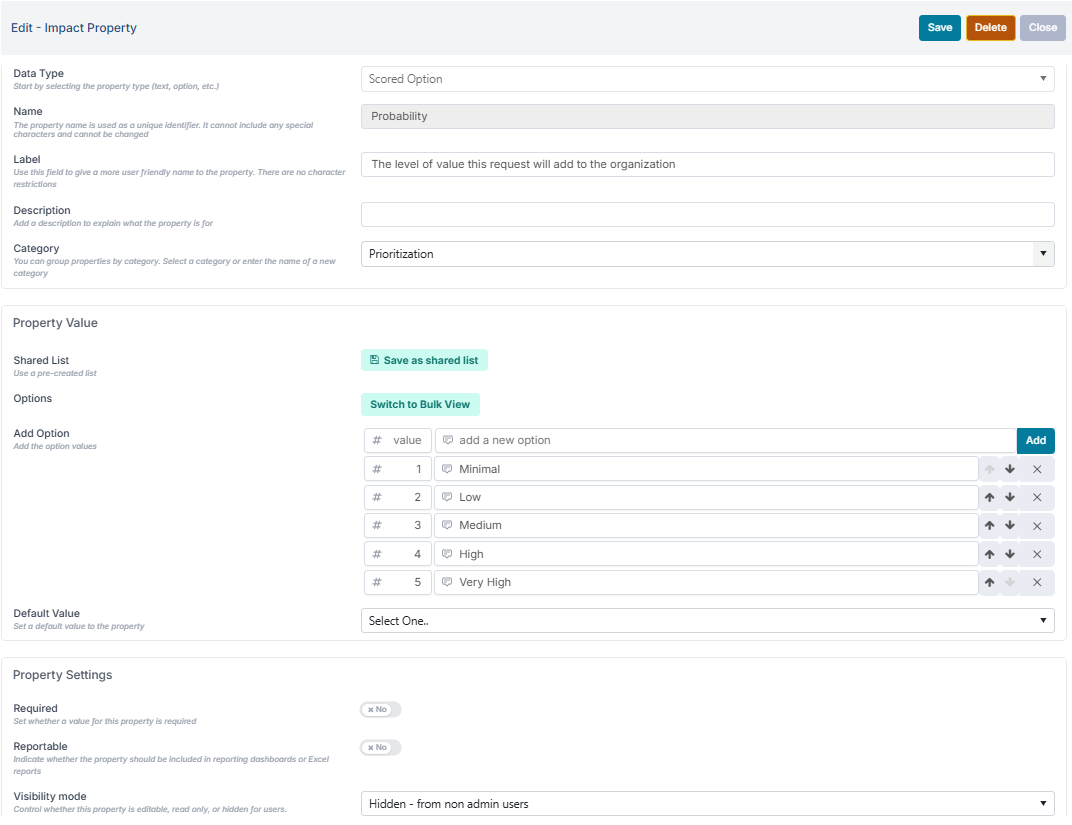
In the dialog that appears, fill in all the required fields such as name, category, data type, and configuration options.
The next sections describe each setting in detail.
Save your changes
Once all details are complete, click Save.
The property will immediately become available for all records of the selected entity type.
Property Details
The Property Details section defines the type and behaviour of the custom property.
Data Type
Select the data type that determines how values are stored, displayed, or calculated.
Data Type | Description |
Text | A single line of free text. |
Text Area | A larger free-text box for longer entries. |
Rich Text | A free-text box with formatting options such as bold, italics, and bulleted or numbered lists. |
Number | Restricts the property value to numeric input only. |
Percentage | Similar to Number but limited to percentage values (0–100%). |
Date | Used when the property represents a date value. |
Yes/No | Displays a toggle switch for a simple true/false selection. |
Option List | Allows a single value to be selected from a predefined dropdown list. |
Multiselect Option | Allows multiple values to be selected from a dropdown list. |
Scored Option | Similar to Option but each option includes an associated numeric weight (useful for scoring). |
Scored Option (Calc) | Extends Valued Option by automatically calculating a score or rating based on weighted values. |
Cascading Option | Defines a hierarchy of dependent lists (e.g. Region → Country → City). Each level’s options depend on the parent selection. |
Person | Enables you to select a user as the property value. |
Person Multiselect | Enables you to select multiple users as the property value. |
Project | Enables you to select a project as the property value. |
Hyperlink | Displays two fields — one for the URL and one for the link text. |
Table | Lets you define a structured table within the property, including configurable columns, data types, and optional expressions. |
Note: If your organisation has created catalog types, these also appear in the list of available data types. Learn more about catalog types.
Once you’ve selected a data type, additional configuration options may appear — for example, defining dropdown options, table columns, or cascading levels.
Other attributes
Field | Description |
Name | The system name of the custom property. The name must contain of alphanumeric characters only. |
Label | Optional display name. If set, the label is shown to users instead of the property name — ideal for providing a friendlier or more descriptive title. Labels can include special characters. |
Category | Groups related custom properties under the same heading on the record. You can create new categories or select an existing one. |
Property Value
The options available in the Property Value section depend on the data type you selected in the previous step.
For simple data types such as Text, Number, Percentage, Date, Text Area, Hyperlink, and Yes/No, you typically only need to specify a default value if required.
For data types that involve selectable options, hierarchical lists, or tabular data, additional configuration fields are displayed as described below.
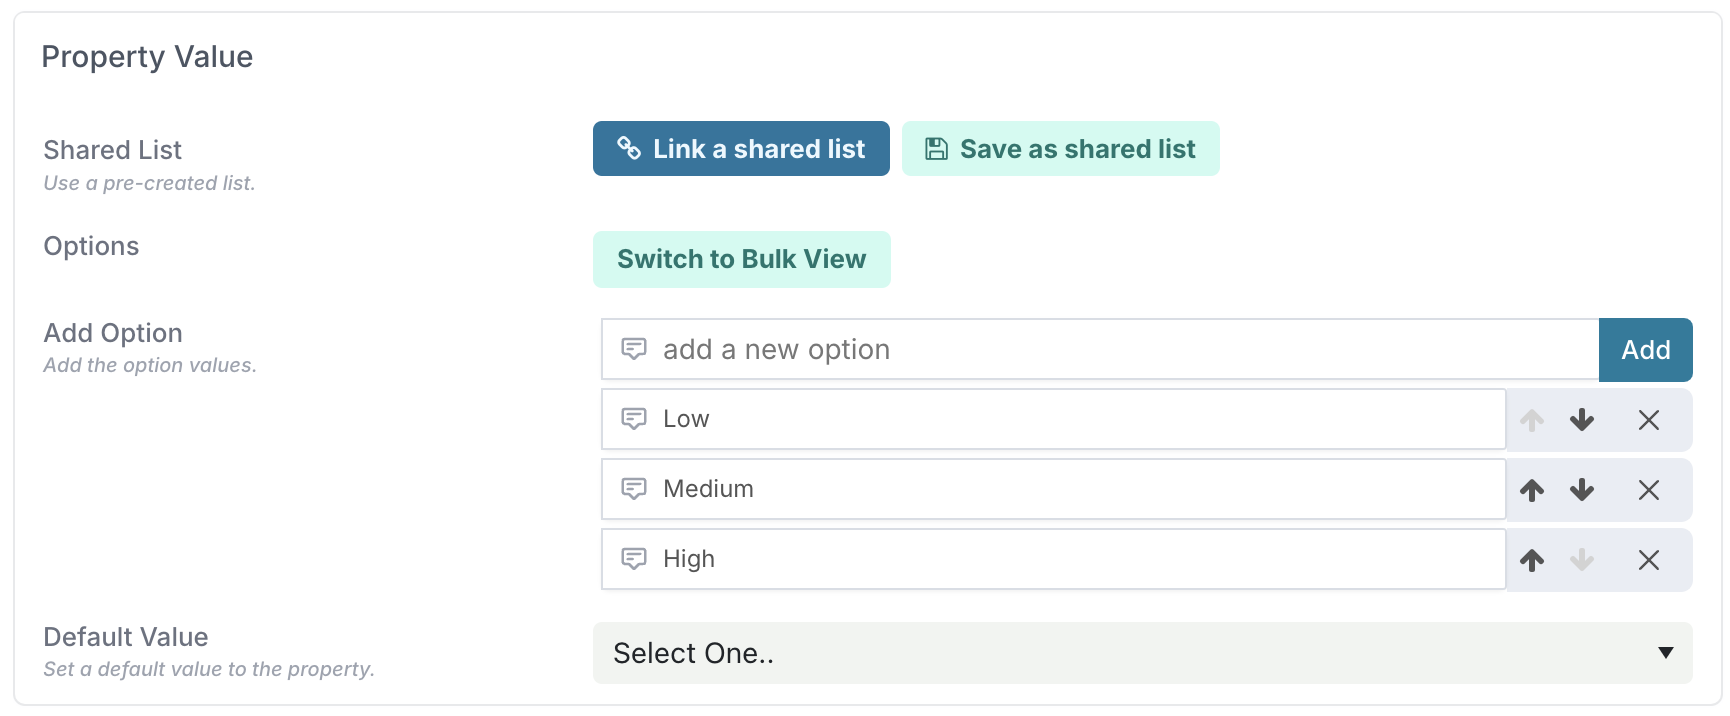
Option-based Data Types
Applies to Option, Multiselect Option, Scored Option, and Scored Option (Calc) types.
You must define the list of selectable values for the property.
Add Option – Add individual values one by one.
Switch to Bulk View – Enter multiple values in bulk (one per line).
Shared List – Link to an existing shared list or save the new list as shared so it can be reused by other properties.
Default Value – Select which option should be pre-selected by default.
💡 Scored Option and Scored Option (Calc) allow you to assign numeric weights to each value and optionally calculate a total score.
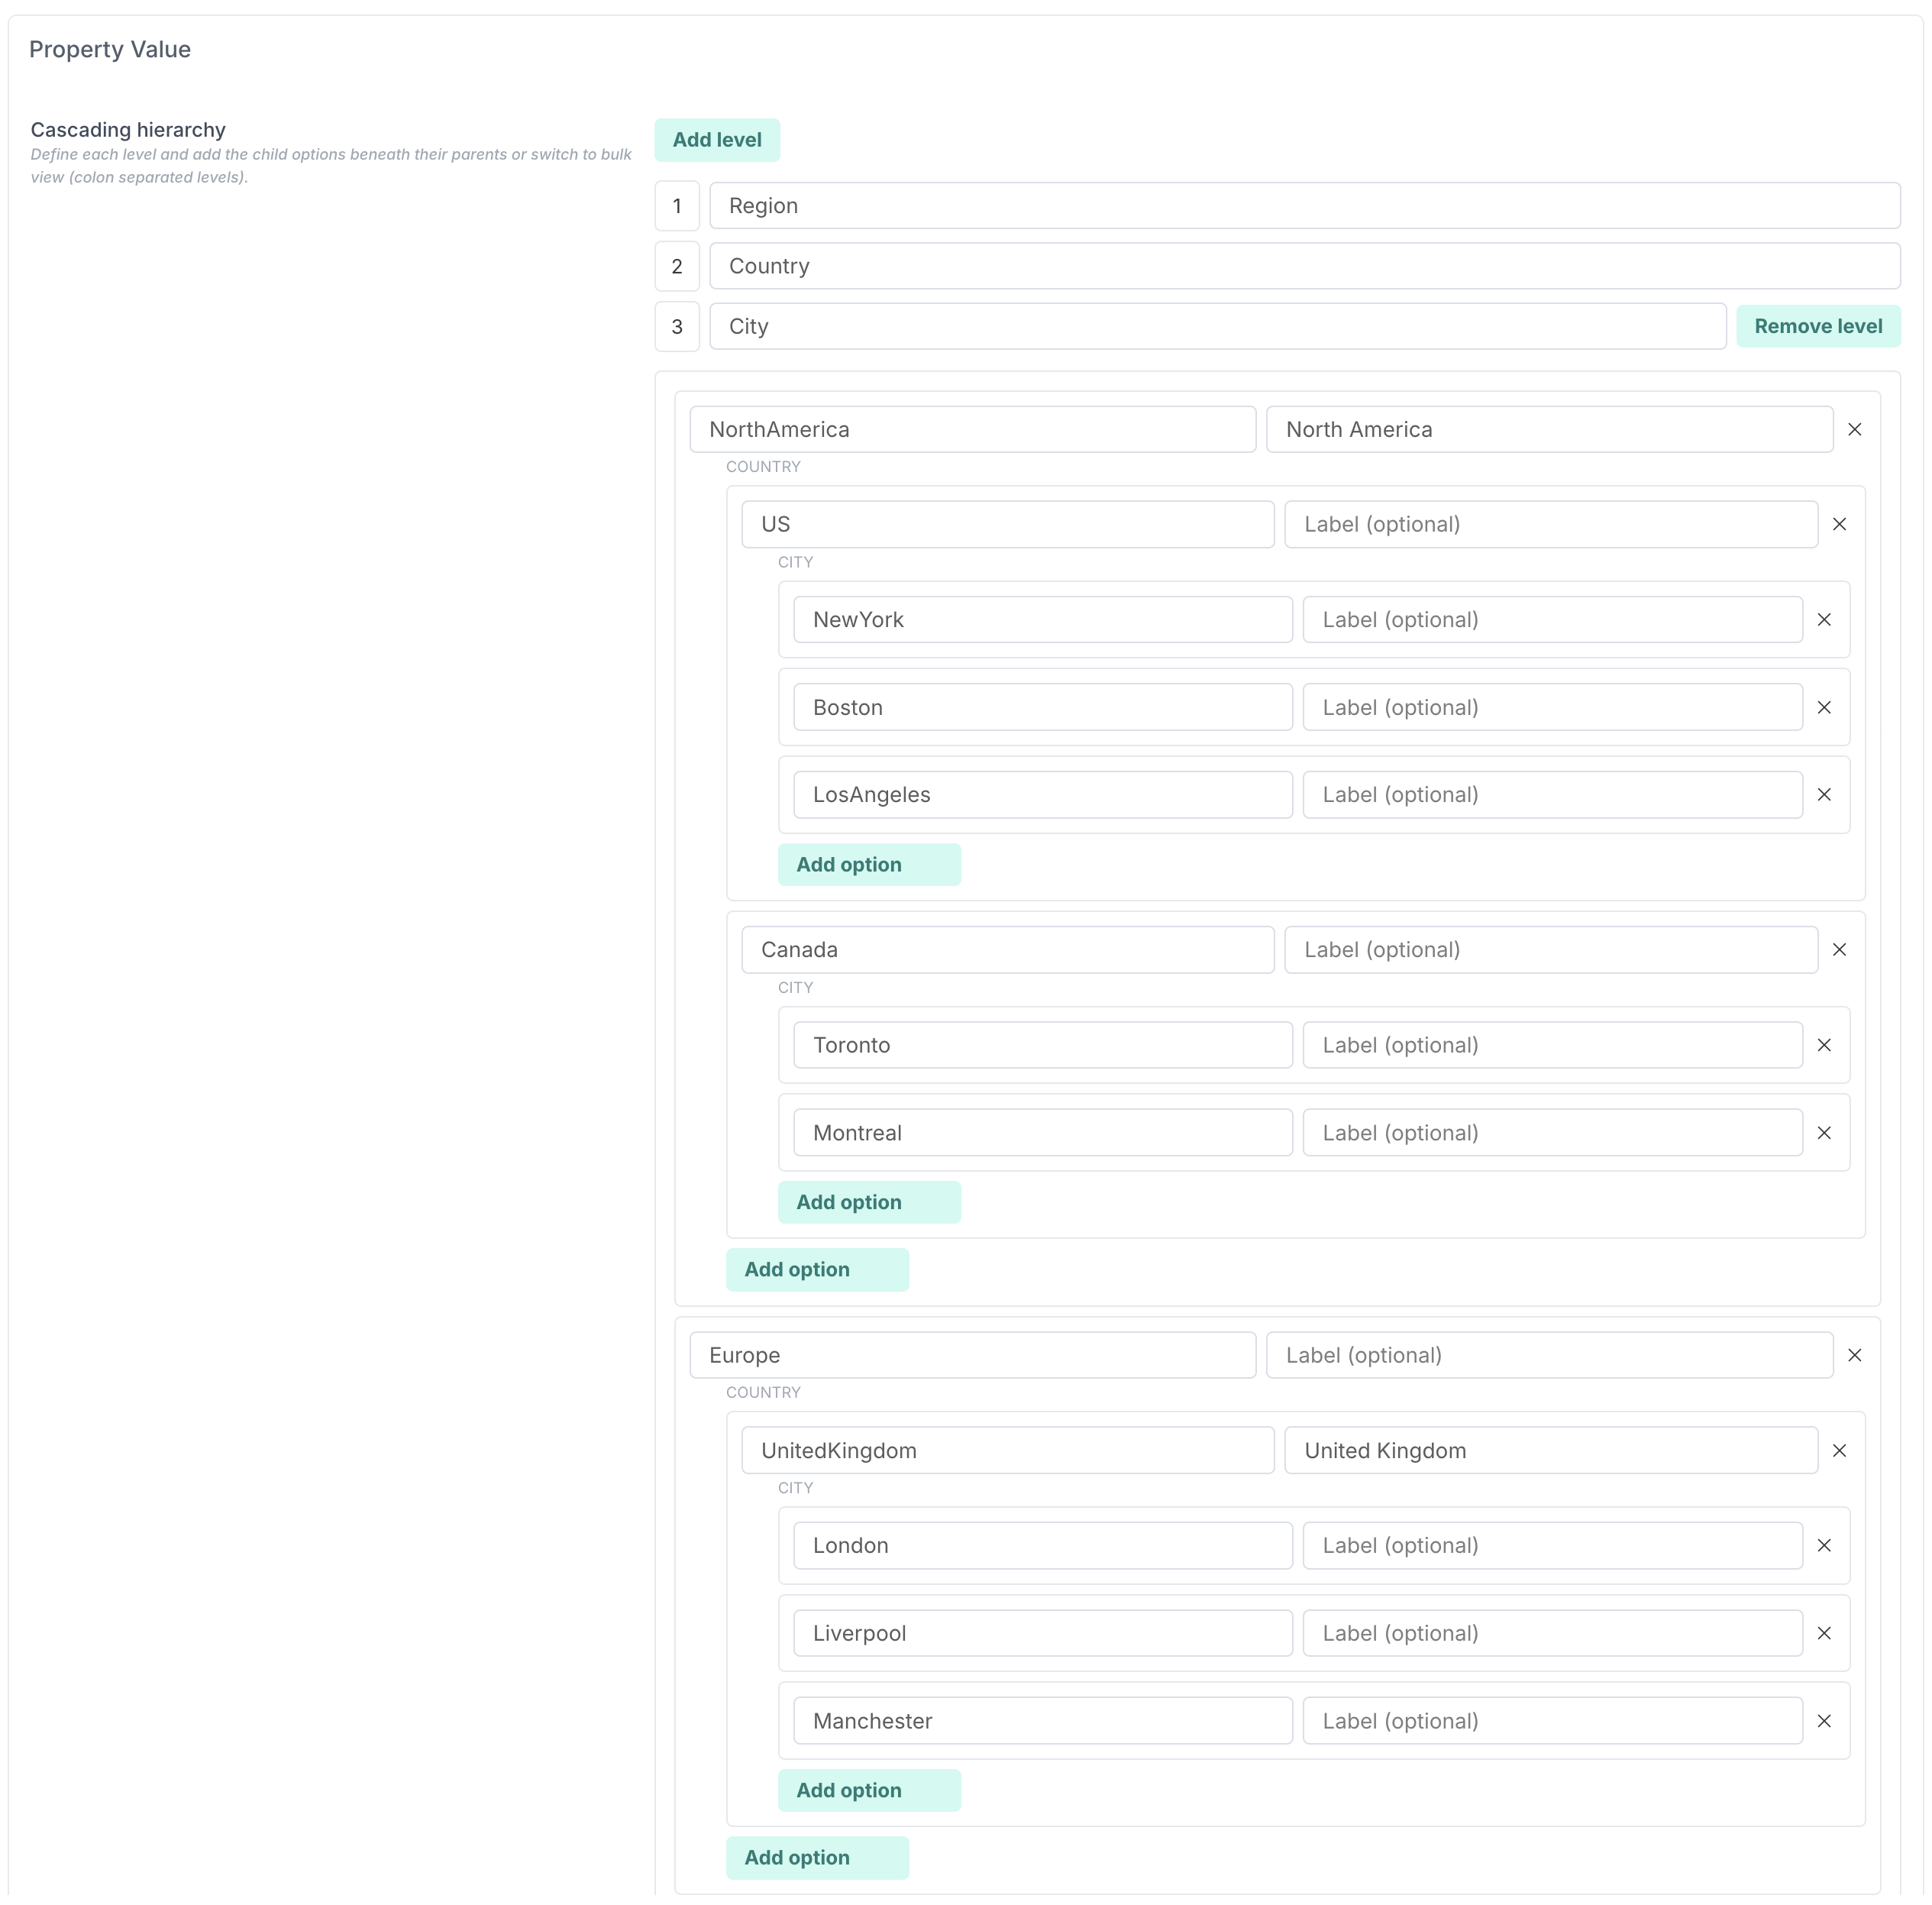
Cascading Option
Use the Cascading Option type to create hierarchical dropdowns where each level depends on the selection above it — for example, Region → Country → City.
In the Property Value section you can:
Add each Level (e.g. Level 1: Region, Level 2: Country, Level 3: City).
Define the options at each level.
Nest child options under their parent value.
Add or remove levels as needed.
💡 Use clear and consistent keys for each option level to make filtering and reporting easier.
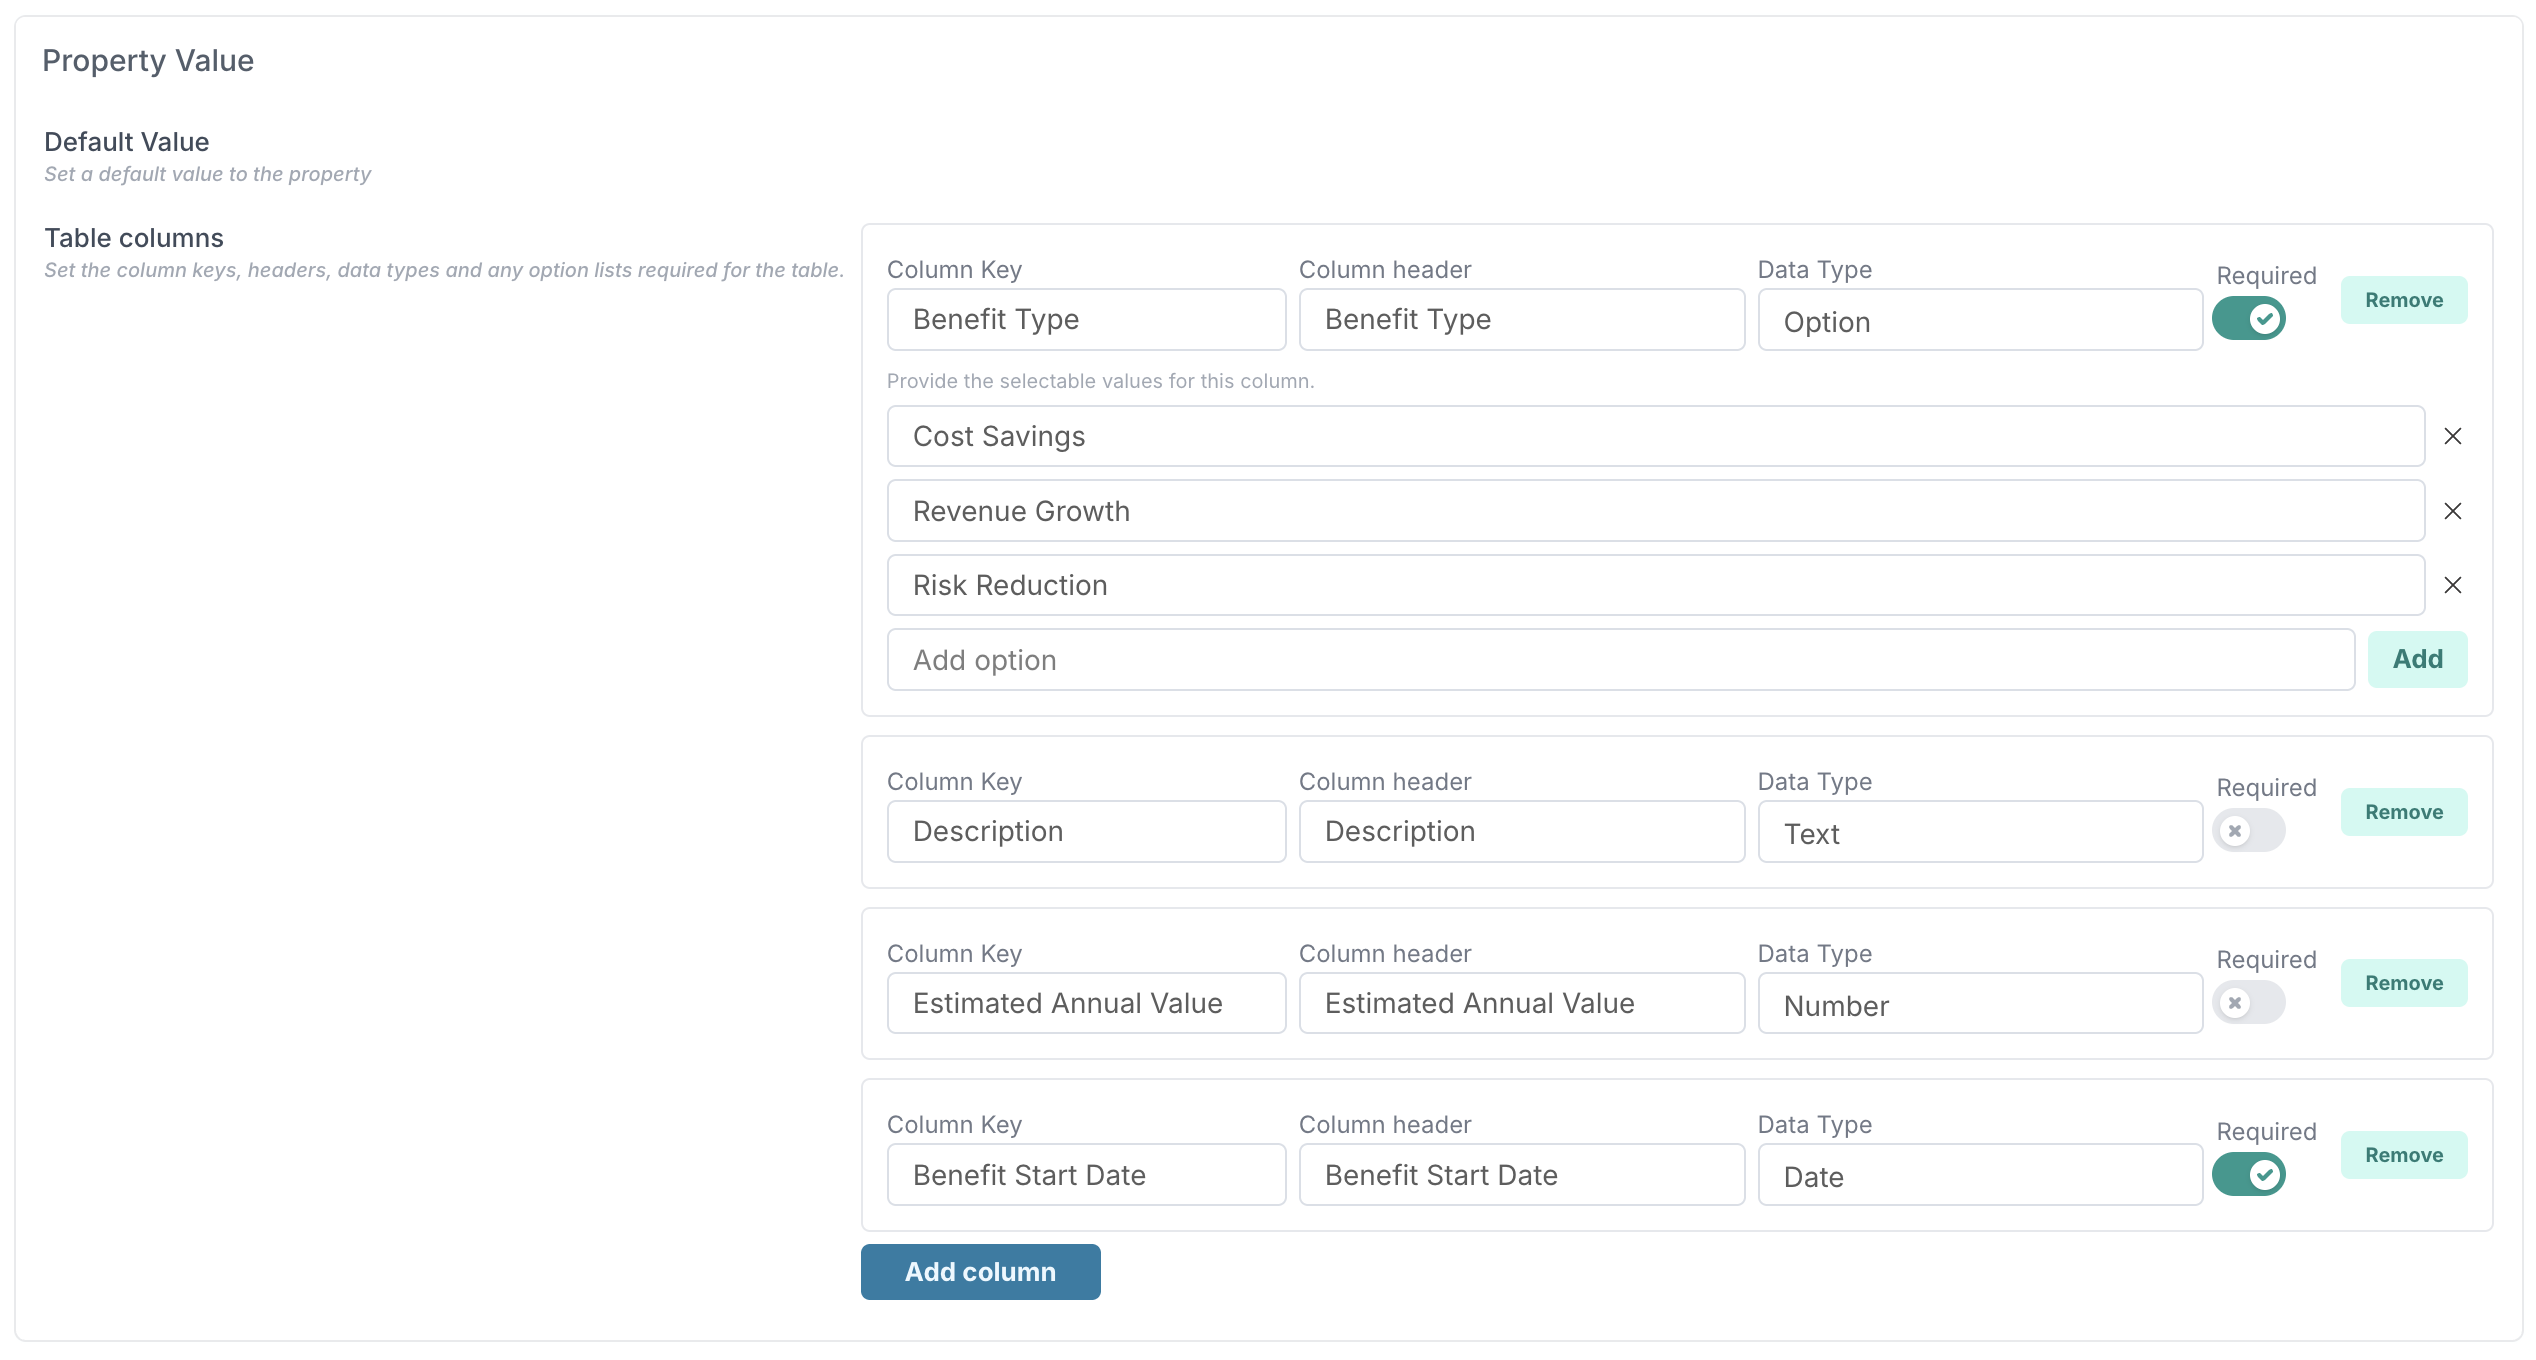
Table
For Table properties, the Property Value section allows you to define the structure of the table. Each column can have its own data type and configuration options.
You can:
Add as many columns as needed.
Specify the Column Key and Column Header.
Select a Data Type for each column (Text, Number, Date, Option, etc.).
Define option values where relevant (e.g. an Option column).
Mark columns as Required if users must enter a value.
Add or remove columns at any time.
💡 Each column behaves like an independent property within the table — you can include expressions, validations, or default values per column.
Property Settings
The Property Settings section defines how the custom property behaves within the record and who can edit its value.
Field | Description |
Required | Set the switch to Yes if this property must always have a value before the record can be saved. |
Reportable | Set the switch to Yes if the property should be displayed each time the entity is viewed and included in reports and Excel exports. Reportable properties also appear in list views, filters, dashboards, and reporting datasets. |
Visibility mode | Control whether this property is editable, read only, or hidden for users.
|
Select applicable types | Set which card type is applicable the property. |
Expression | Use an expression to automatically set this property's value. When enabled, the property value is calculated and is read only for end users. |
Lookup filter | Optionally restrict the person search to records matching a principal property. (filter only applicable to Person data types) |
💡 Use Admin Locked when you want to ensure that a property’s value can only be changed by authorised administrators — for example, compliance flags, financial controls, or configuration metadata.
Additional Settings
Some elements provide additional configuration options to control where or when a property applies:
Impact Properties – You can specify which impact types the property applies to (e.g. Risk, Issue, or Dependency). This means that the property will only be visible and applicable for those specific impact types, rather than for all Impacts.
Person Properties – You can define which engagement type the property applies to, so that the field only appears when the person record matches the selected engagement type.
Conditional Property
The Conditional Property section lets you control whether a custom property is displayed based on the value of another property.
Field | Description |
Property Dependency | Defines if this property should only be visible when another custom property meets a specific condition (for example, when [Has Dependencies] = Yes). This allows you to create dynamic forms where only relevant fields appear based on user input. |
For detailed setup instructions, see the Conditional Custom Properties article article.