
Managing Project Timelines with Schedule Baselines
Every project has a planned start and end date, with tasks, phases, and milestones along the way. It isn't uncommon for a project to experience shifts in this timeline due to unanticipated delays and accelerations. As a project manager, tracking the performance and deliverables of a project at any given time is crucial.
The Schedule Baseline feature allows project managers to not only track how far off schedule the project has shifted from its initial baseline, but also to understand how the schedule has evolved over time with the introduction of Historical Baselines. Project managers can create and access a full timeline of baseline snapshots that show exactly when tasks slipped, recovered, or were brought forward, creating a transparent record of project drift and delivery performance.
The Importance of Baselines
A baseline serves as a fixed reference point for measuring project performance. Establishing baselines is crucial because it allows project managers to:
Measure Performance: Compare planned progress against actual progress to identify any deviations.
Manage Changes: Implement corrective actions when there are significant deviations from the plan.
Communicate Effectively: Provide stakeholders with a clear picture of the project's status and any changes that have occurred.
Historical baseline tracking in Fluid ensures that multiple snapshots of the project plan can be taken and remains available for review, giving teams the ability to identify longer‑term trends such as repeated slippage or consistent early delivery, while also providing an auditable view of how the schedule has evolved over time.
Baselining should occur at the beginning of the project once the initial plan is approved, and then again at major milestones or whenever significant changes to scope, timelines, or resources occur. Regular re‑baselining keeps the historical timelines accurate and meaningful, ensuring comparisons between planned and actual performance remain relevant for project managers, PMOs, sponsors, and governance groups.
Historical Continuity Note: The system records all baselines created from the point historical tracking was introduced, carrying forward only the most recent pre‑tracking baseline. All future baselines are retained.
Setting the Initial Baseline
Once your schedule plan is outlined, lock in the initial baseline by clicking on 'Baseline'.
Navigate to Edit in Gantt View within the project workspace.
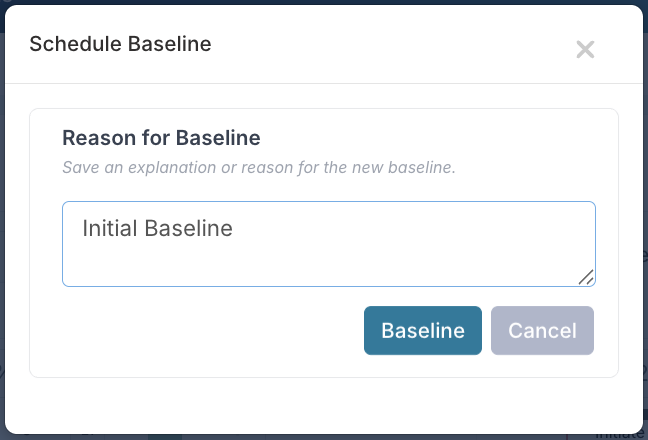
Click Baseline and enter the reason for the baseline into the dialogue.
Click the Baseline button to confirm the action and lock in the project’s initial plan.

Establishing an initial baseline is crucial because it serves as a reference point against which all future progress and changes are measured. A well-defined initial baseline allows project managers to identify deviations from the original plan, making it easier to implement corrective actions and maintain project control.
Baseline Options and Usage
As the project progresses, individual tasks or the entire schedule may need to be re-baselined due to changes in scope, delays, or shifts in priority. This can be done at various levels within a task's hierarchy:
Task Only: Baseline the specific task. This is useful when a single task's timeline changes without affecting related tasks.
Task and Parents: Baseline the task and its parent tasks. Use this when changes in a task affect its higher-level parent tasks.
Task and Subtasks: Baseline the task and its subtasks. This is helpful when changes in a task impact the tasks that depend on it.
Task, Parents, and Subtasks: Baseline the task, its parents, and its subtasks. This is beneficial for significant changes that impact the entire task hierarchy.
Entire Schedule: Re-baseline the entire project schedule to reflect significant changes that affect the overall timeline.
Each baseline is then stored as part of the schedule’s historical record, allowing you to revisit and review the timeline at any point.
How to Baseline Your Schedule
Baseline the Entire Schedule
Navigate to Gantt View: Open your project workspace and click on the Edit Gantt button to open the project schedule.
Set Baseline: Click on the Baseline button.
Confirm Changes: You will be prompted to enter the reason for the baseline and confirm the changes. Click the Baseline button to set the new baseline for the entire schedule.
This is typically used at major governance points or following significant replanning.
Baseline a Specific Task
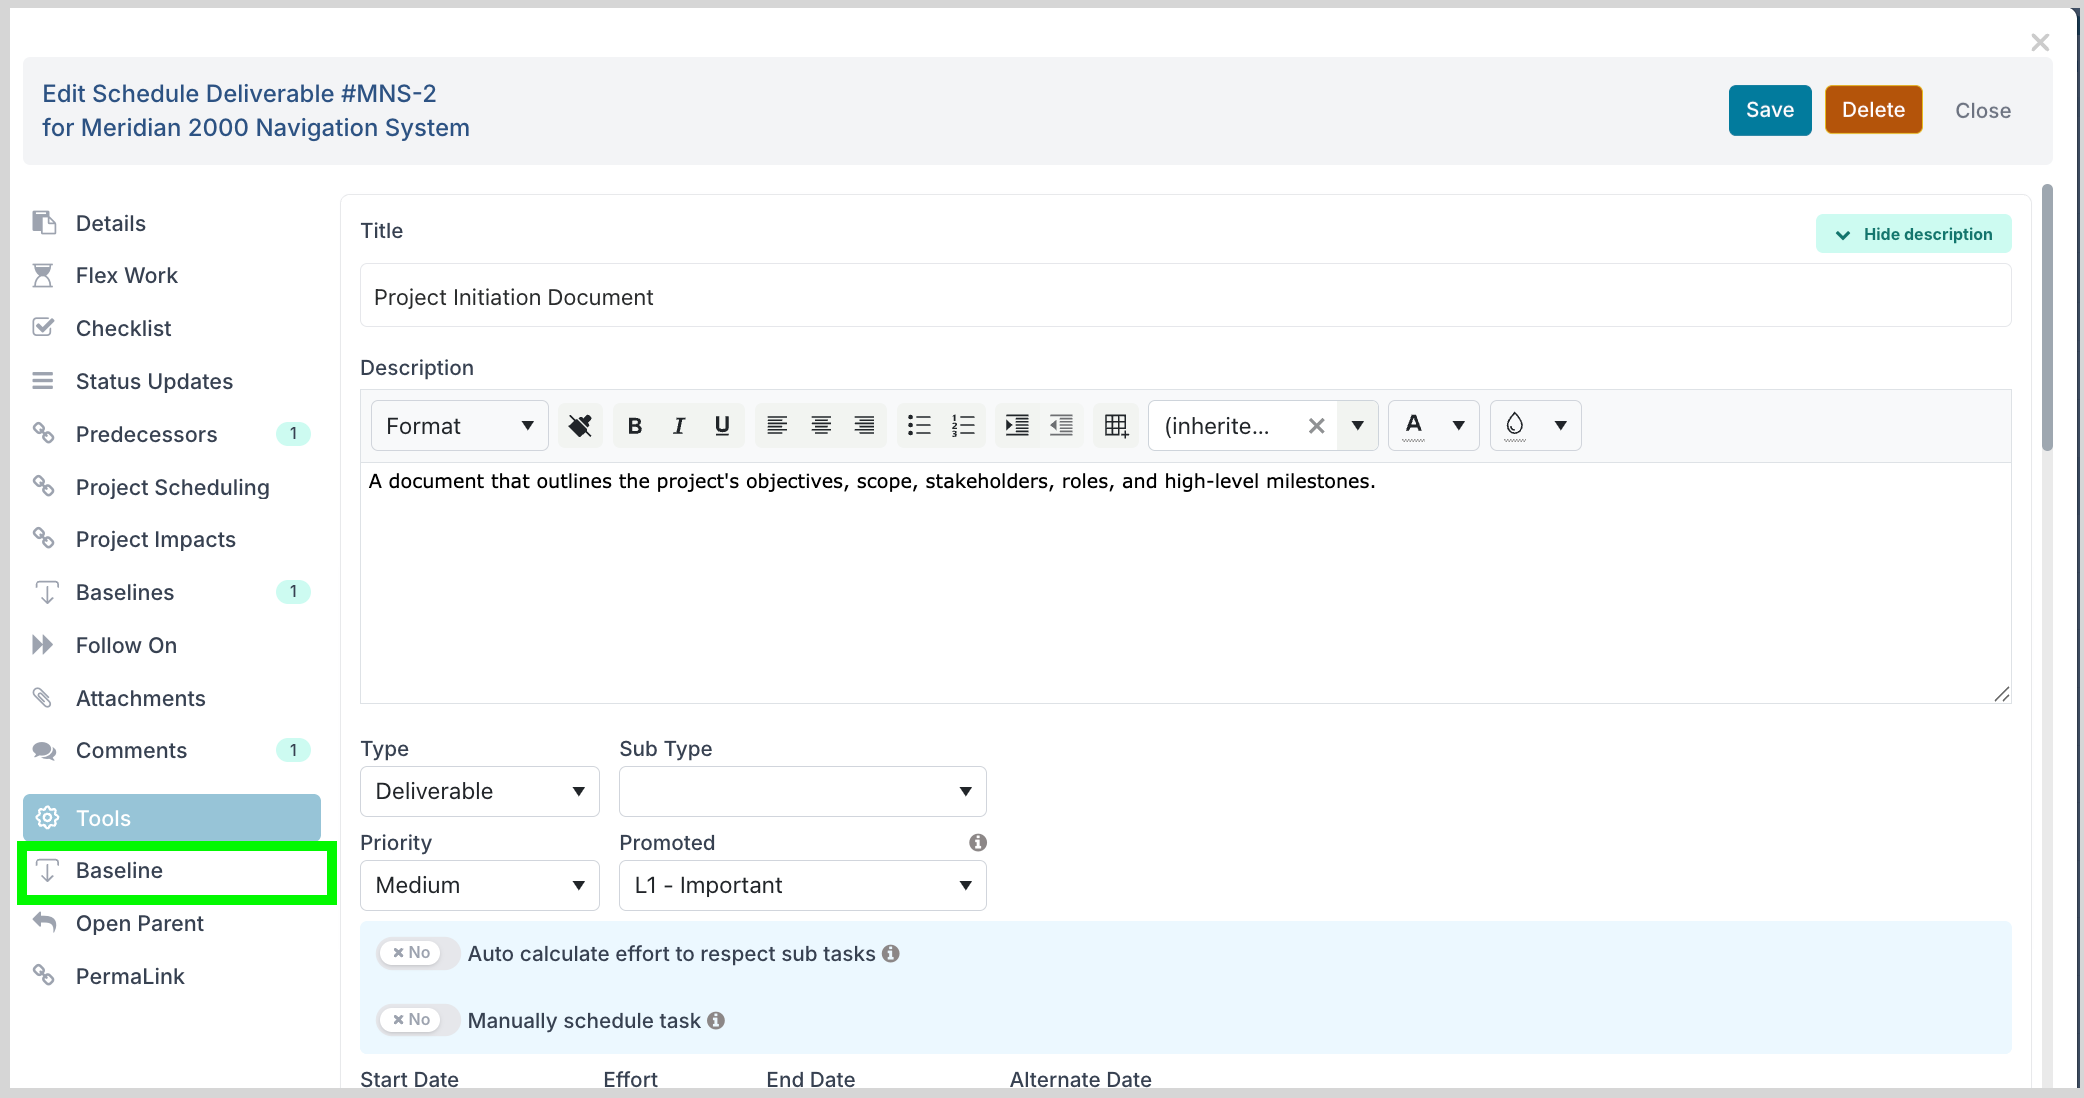
Open the Task Dialog: Double-click on the specific task in the Gantt view to open the task dialog.
Select Baseline: Go to the Tools menu within the task dialog and select Baseline.
Choose Baseline Scope: Select the appropriate scope for the baseline (Task Only; Task and Parents; Task and Subtasks; Task, Parents & Subtasks; Entire Schedule).
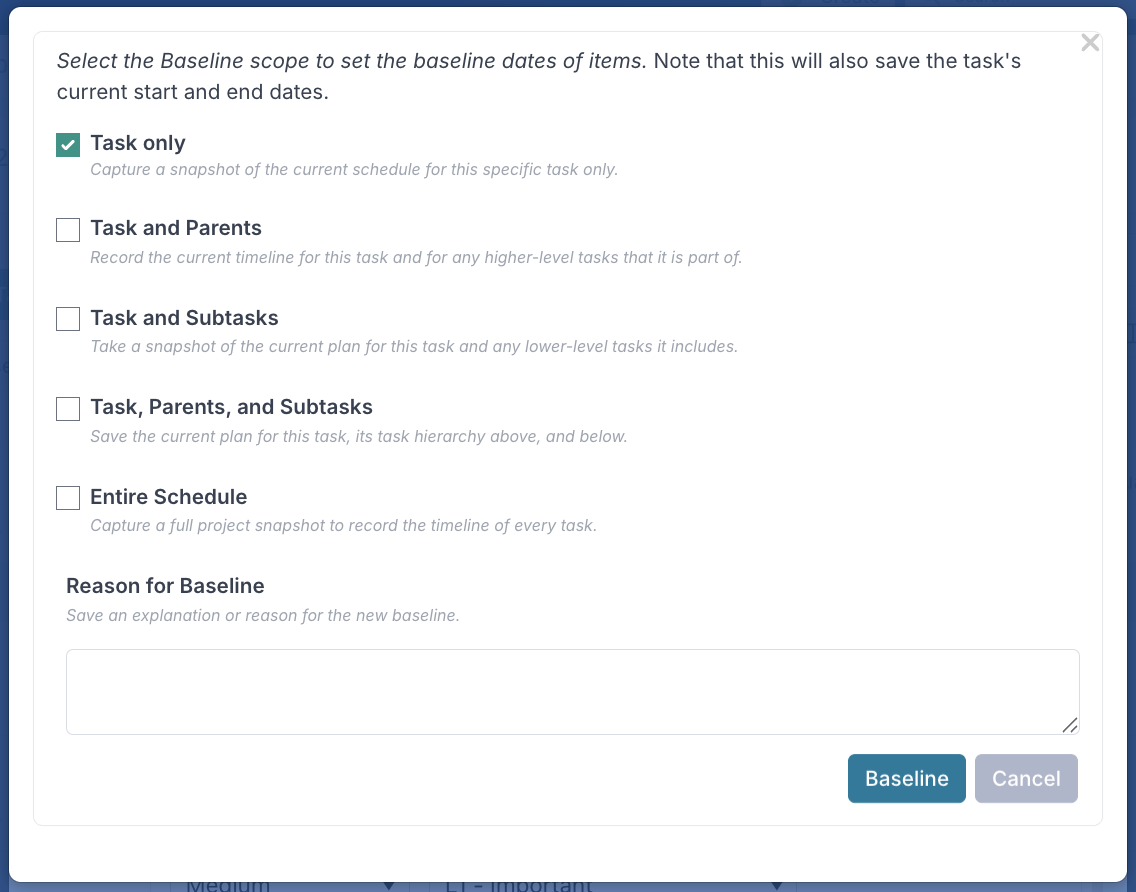
Save Changes: Click Baseline to set the new baseline dates.
These task‑level baselines also contribute to the task’s own baseline history, providing granular insight into specific work items.
Viewing Baseline Dates and History at Task Level
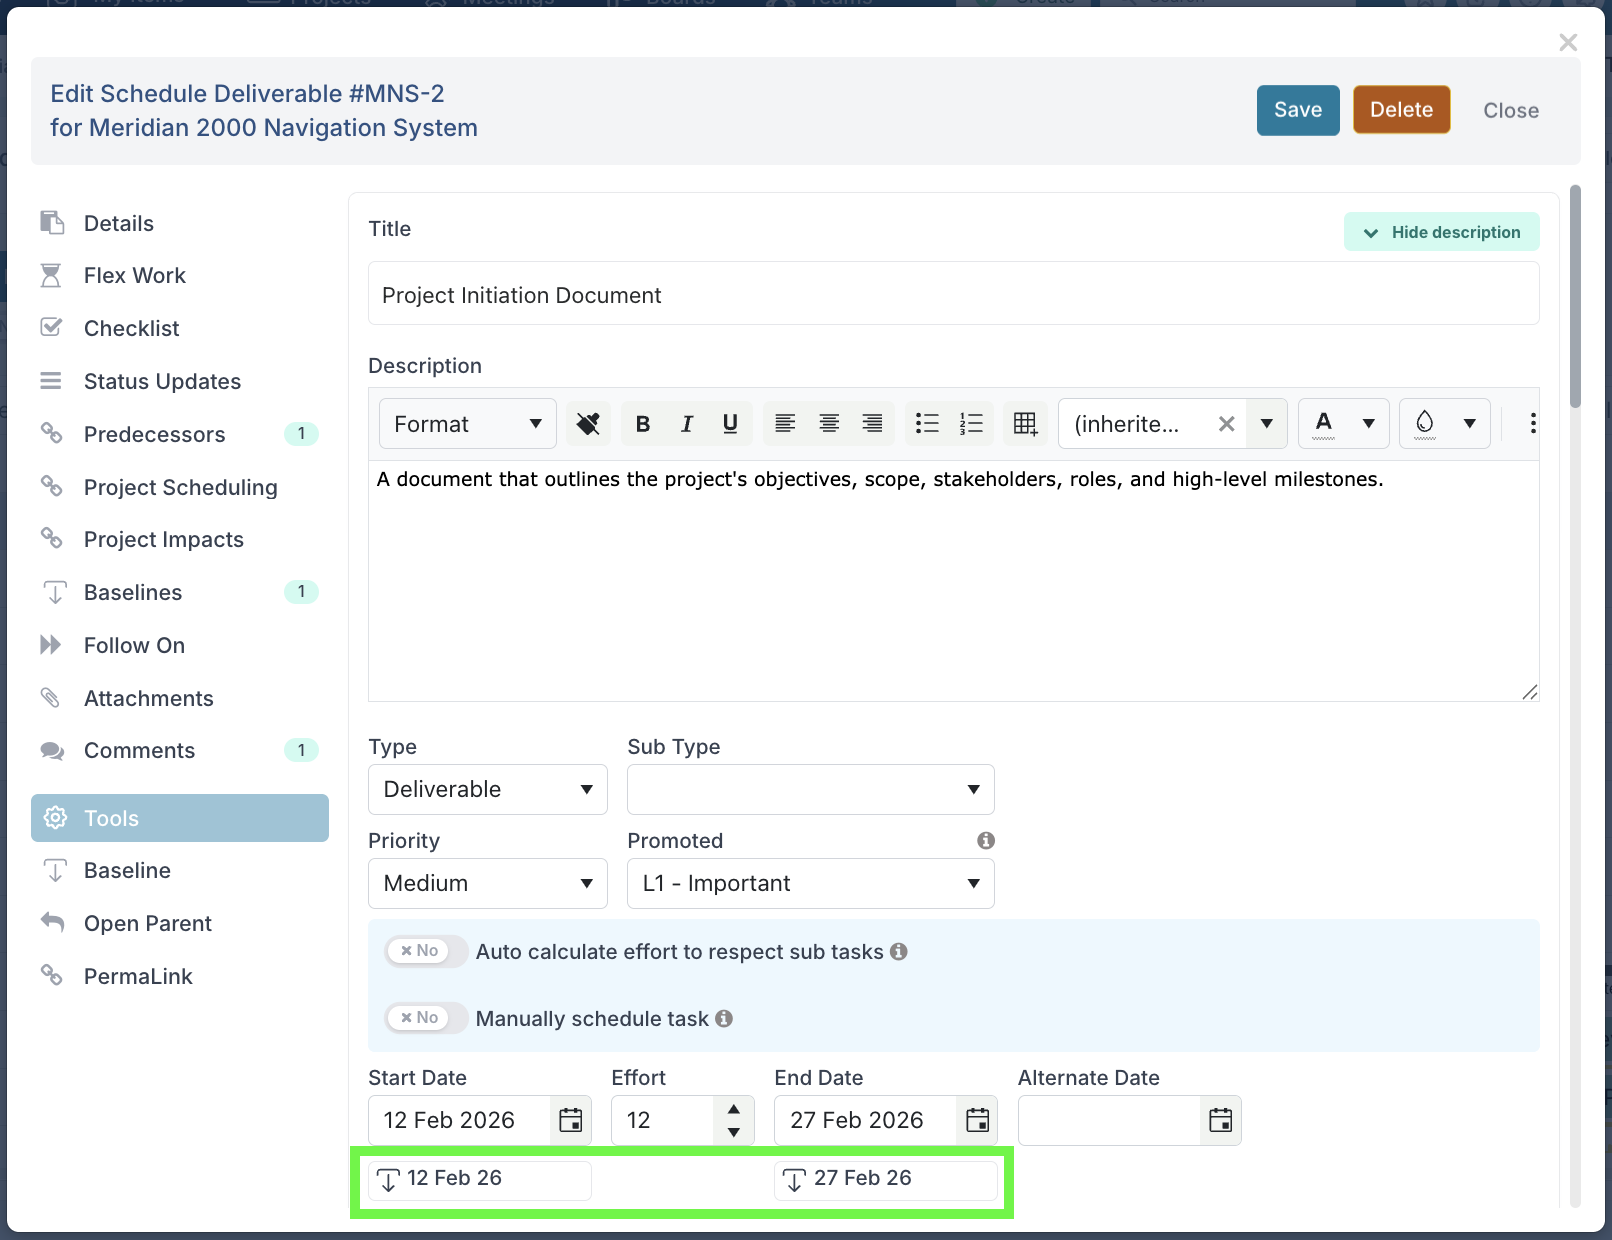
To see the baseline dates for a specific task, open the task dialog by double-clicking on the task in the Gantt view. Baseline dates appear beneath current dates, allowing direct comparison and clear variance tracking.
Additionally, when you open a schedule task, you can view the baseline history directly within the task record, by clicking on the Baselines option.
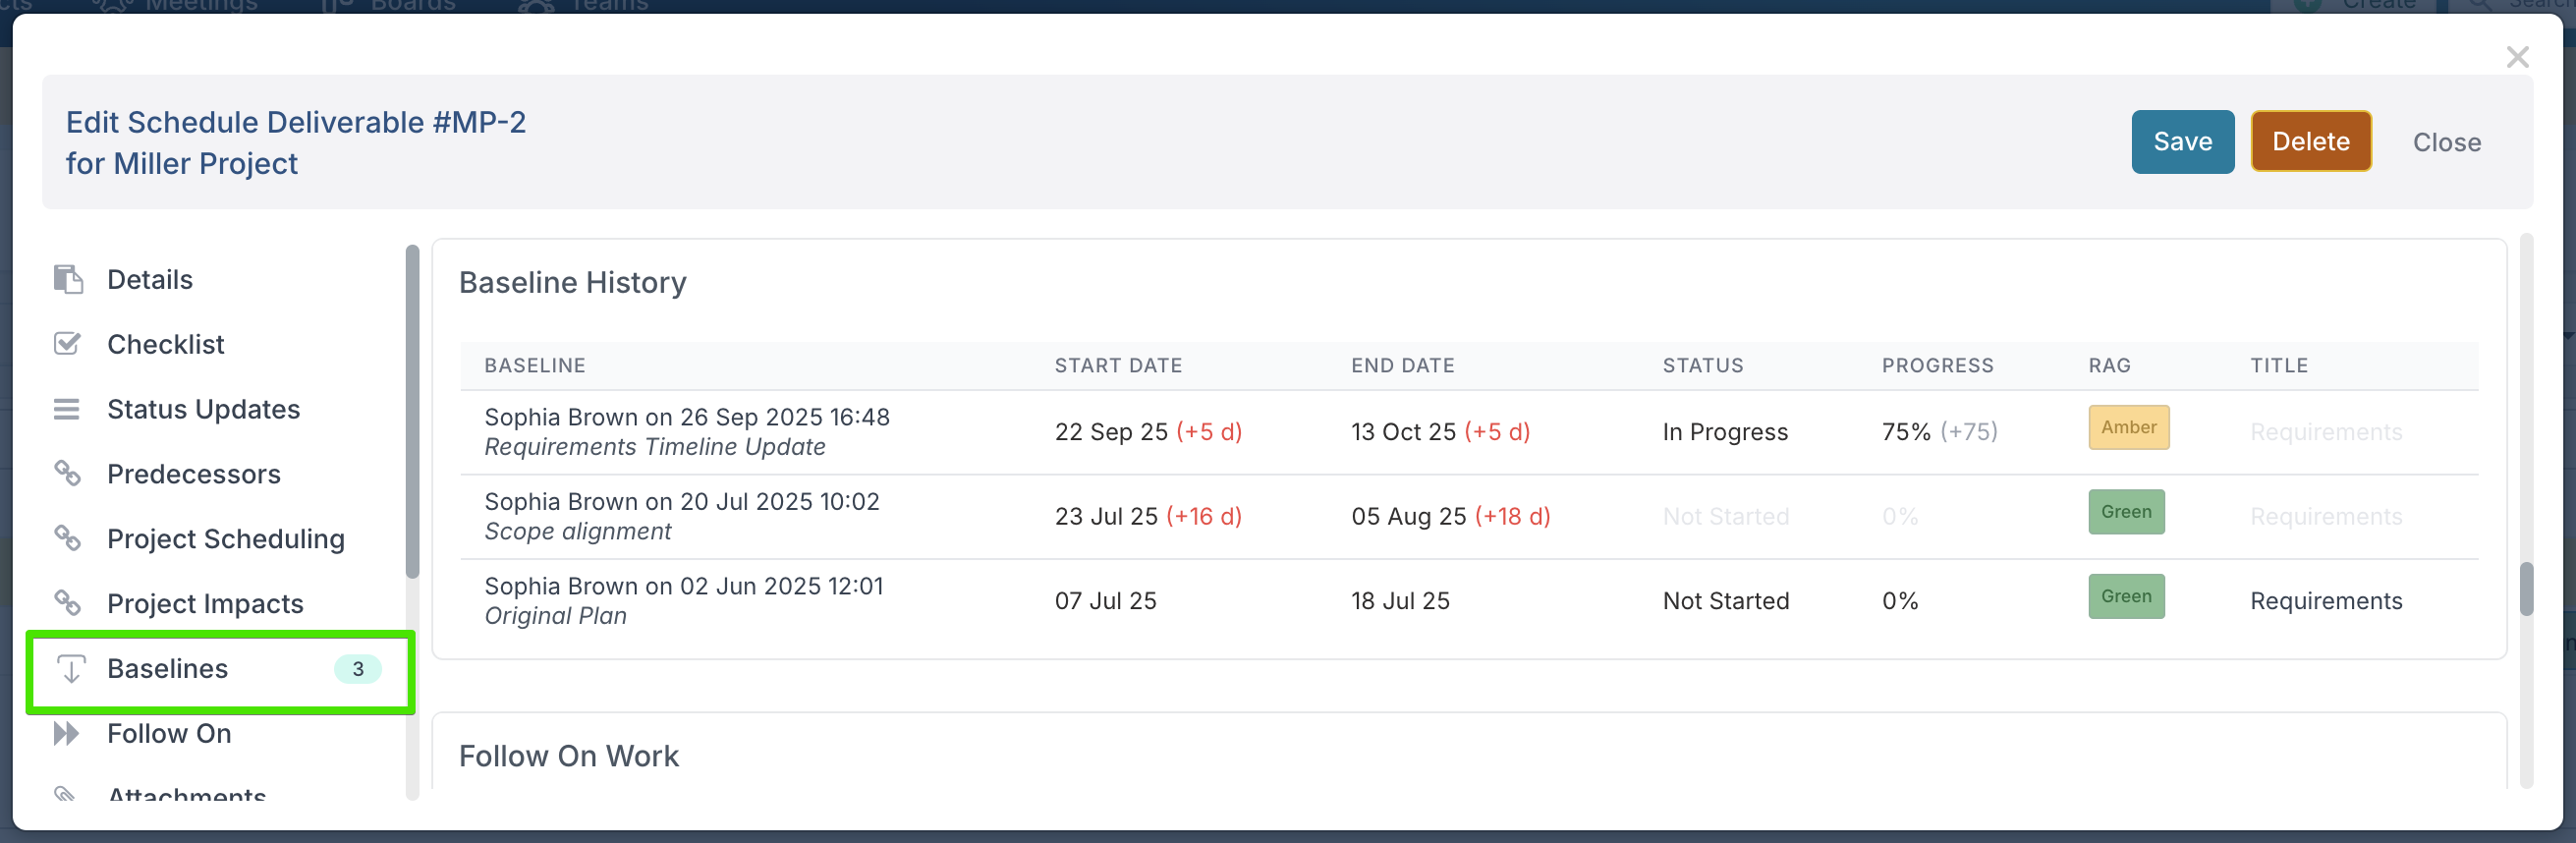
Each baseline entry shows:
The baseline date and description.
How the start and end dates have shifted compared to the baseline (e.g. +5d, +18d).
The status of the task at the time (e.g. Not Started, In Progress).
The progress percentage recorded against the task.
The RAG status (Green, Amber, Red).
The task title at the time of the baseline.
This means a baseline is not only about tracking how dates have changed, but it also provides full context of where the task was in terms of status, progress, RAG status, and even title at that moment in time.
To make changes easy to spot, any field that has not changed between baselines appears greyed out. In the example image above, the Requirements title is greyed out in two of the baselines because it stayed the same, while the start/end dates and progress fields are highlighted in colour where changes occurred.
By capturing this additional context, baselines become a complete audit trail: you can review not only when tasks shifted but also how they were performing and what information changed when the baseline was taken.
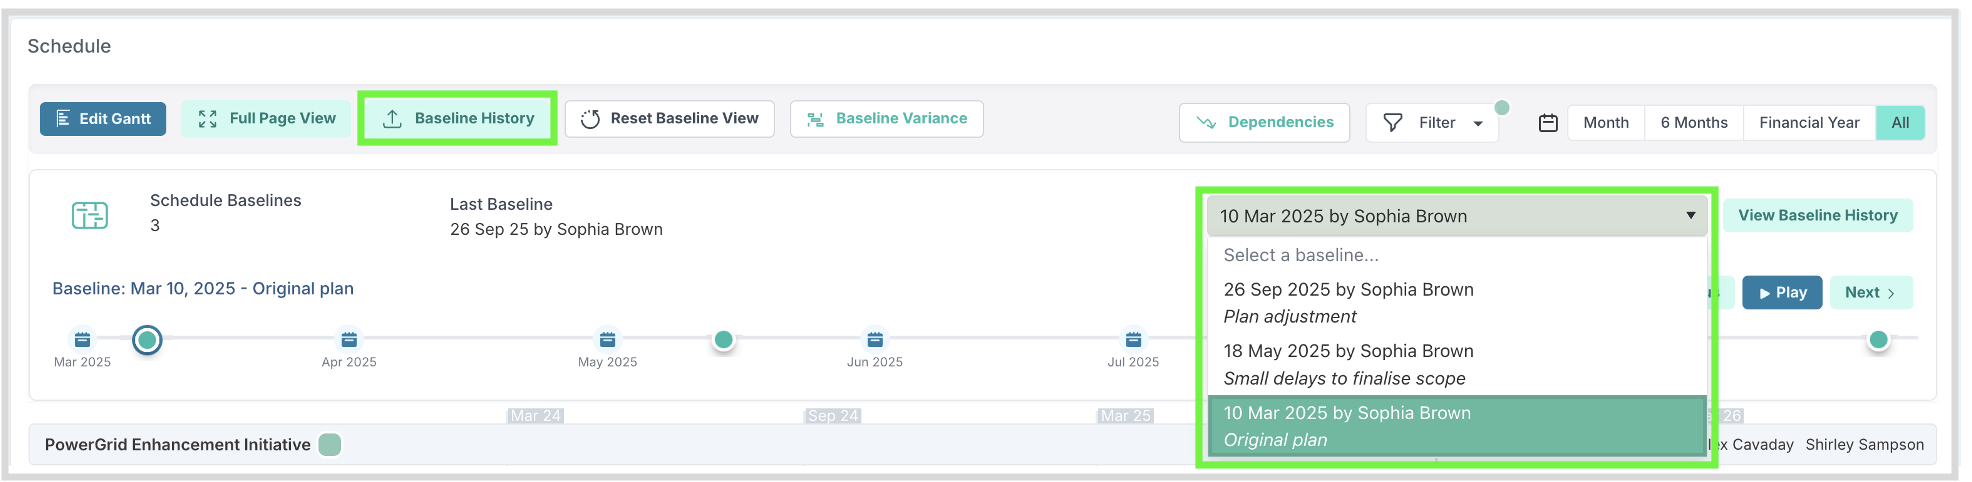
Viewing the Baseline History at Schedule Level
Click Baseline History button on the to see all the baselines that have been created for your schedule.

From here you can:
Pick a specific month from the timeline

Click on one of the dots that represent baseline dates

Select a baseline directly from the dropdown list. This list represents the baselines
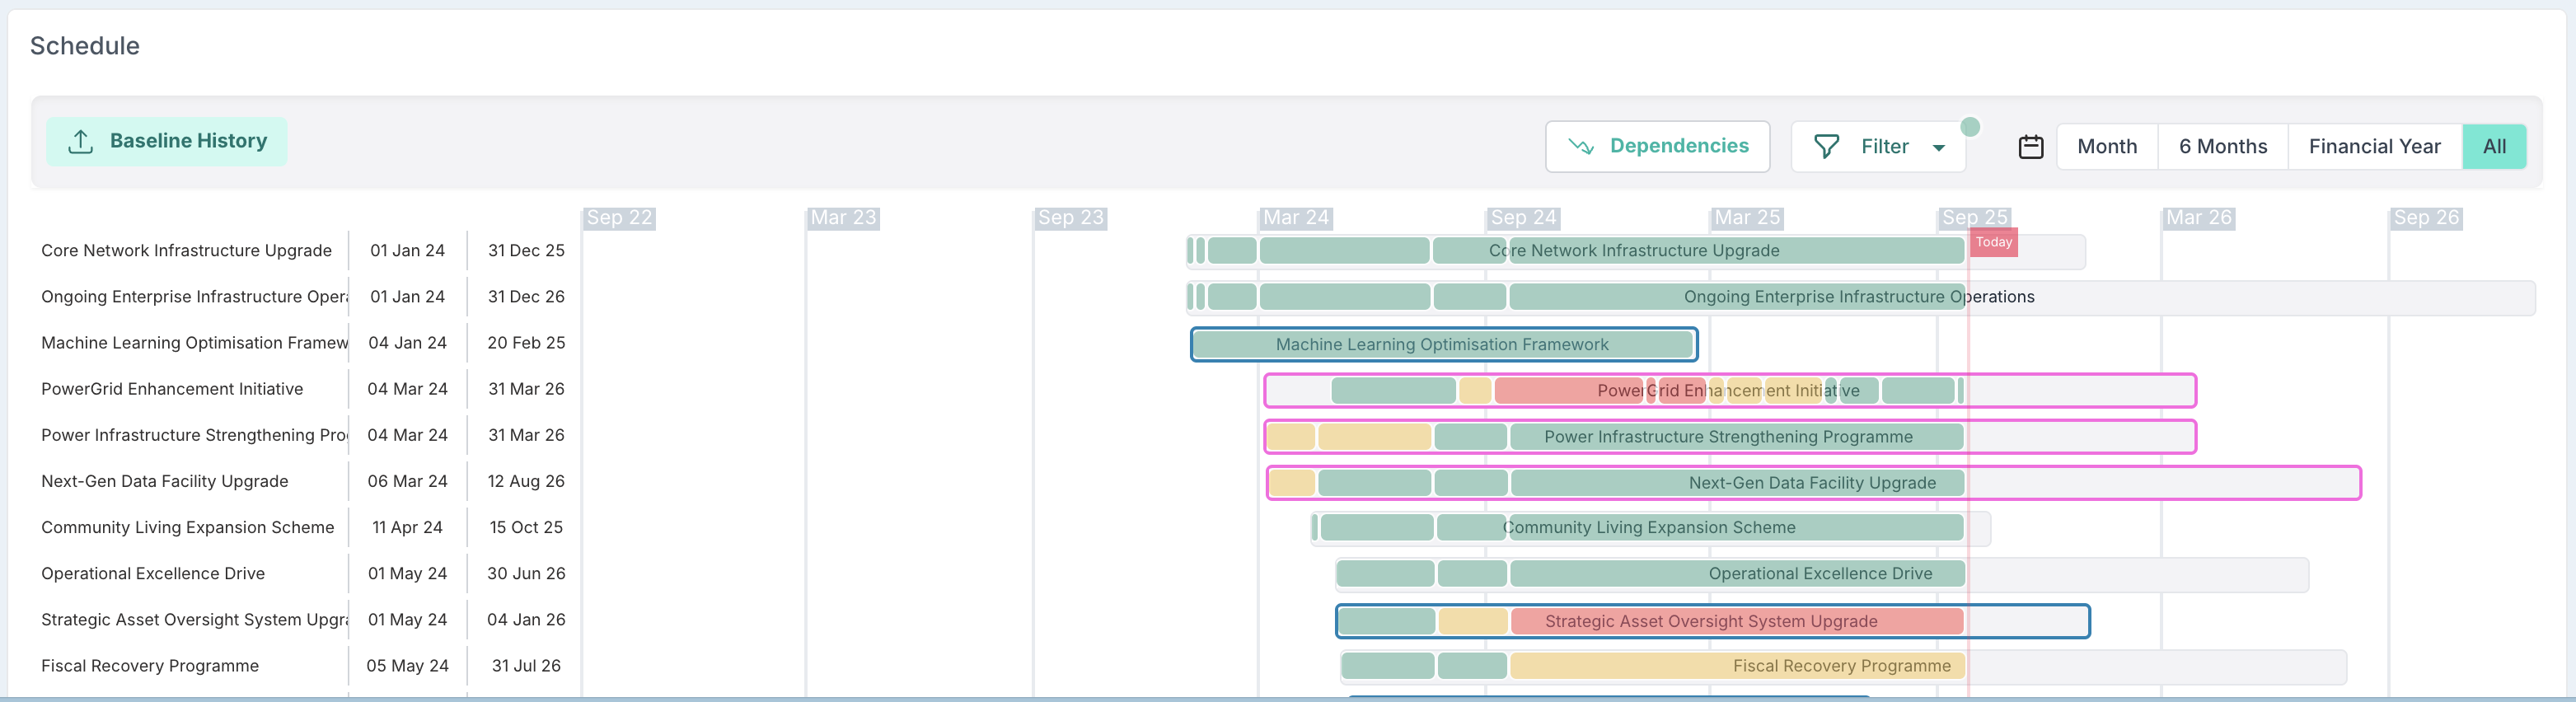
When a baseline is selected, the schedule shows how each task has moved. Coloured lines appear beneath the task bars to indicate variance:
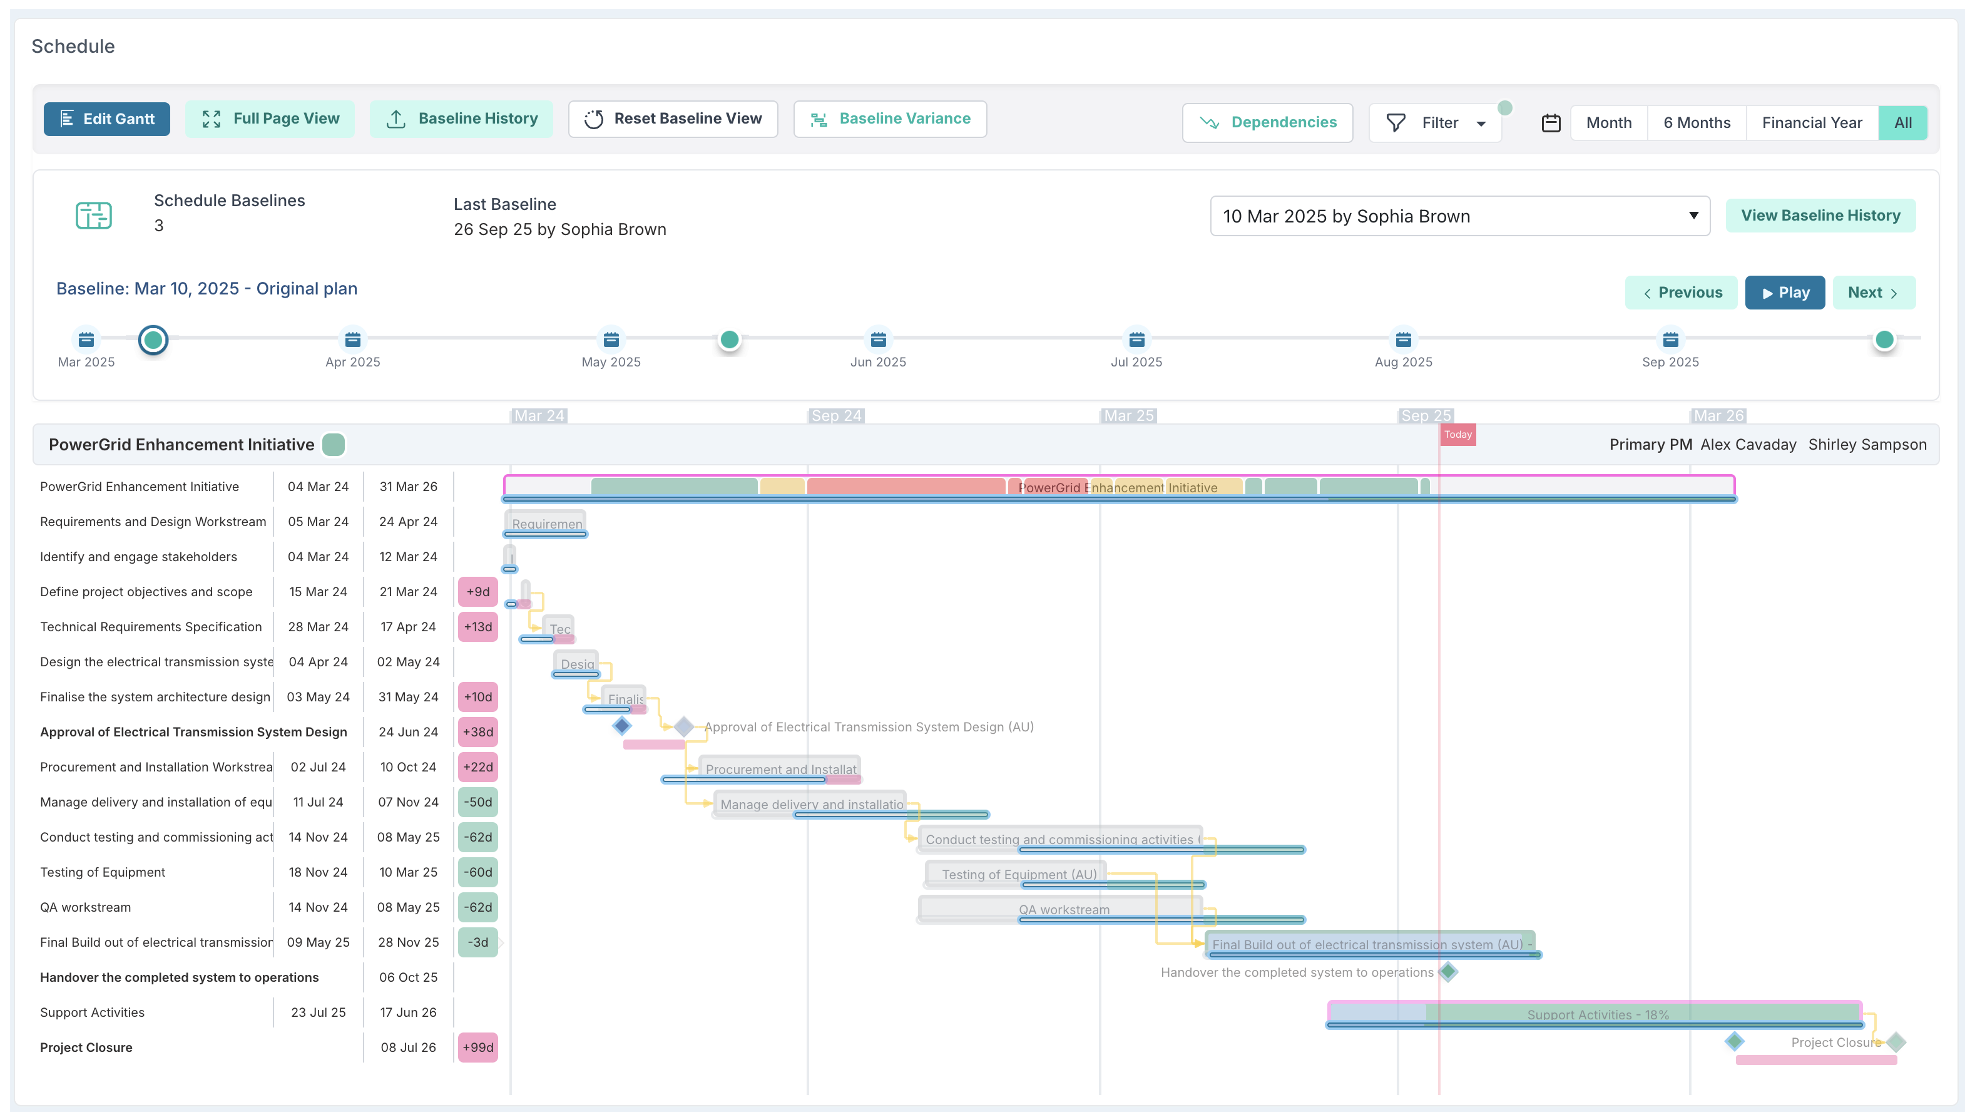
Baselined tasks are visually indicated include by:
Variance column: showing numeric shift (e.g. +22d = task delayed by 22 days, –5d = task started 5 days earlier).
Blue line under the task: where the task was originally planned.
Pink line under the task: where the task has been moved out later compared to the baseline.
Green line under the task: where the task has been moved earlier compared to the baseline.
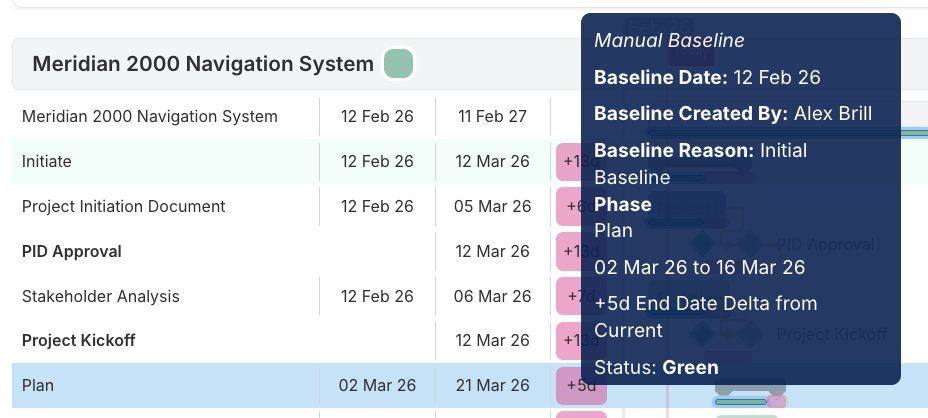
Hovering over indicators provides detailed information about the task at the time the baselined task, including the end date delta, or variance, from the baseline to the current day's state.
Baseline Variance On/Off
When looking at a snapshot of a schedule using the Baseline History, you can toggle the baseline variance indicators on/off but clicking the % Baseline Variance button at the top of the schedule.

Additionally, you can reset the schedule view back to today's current view by clicking the Reset Baseline View button.

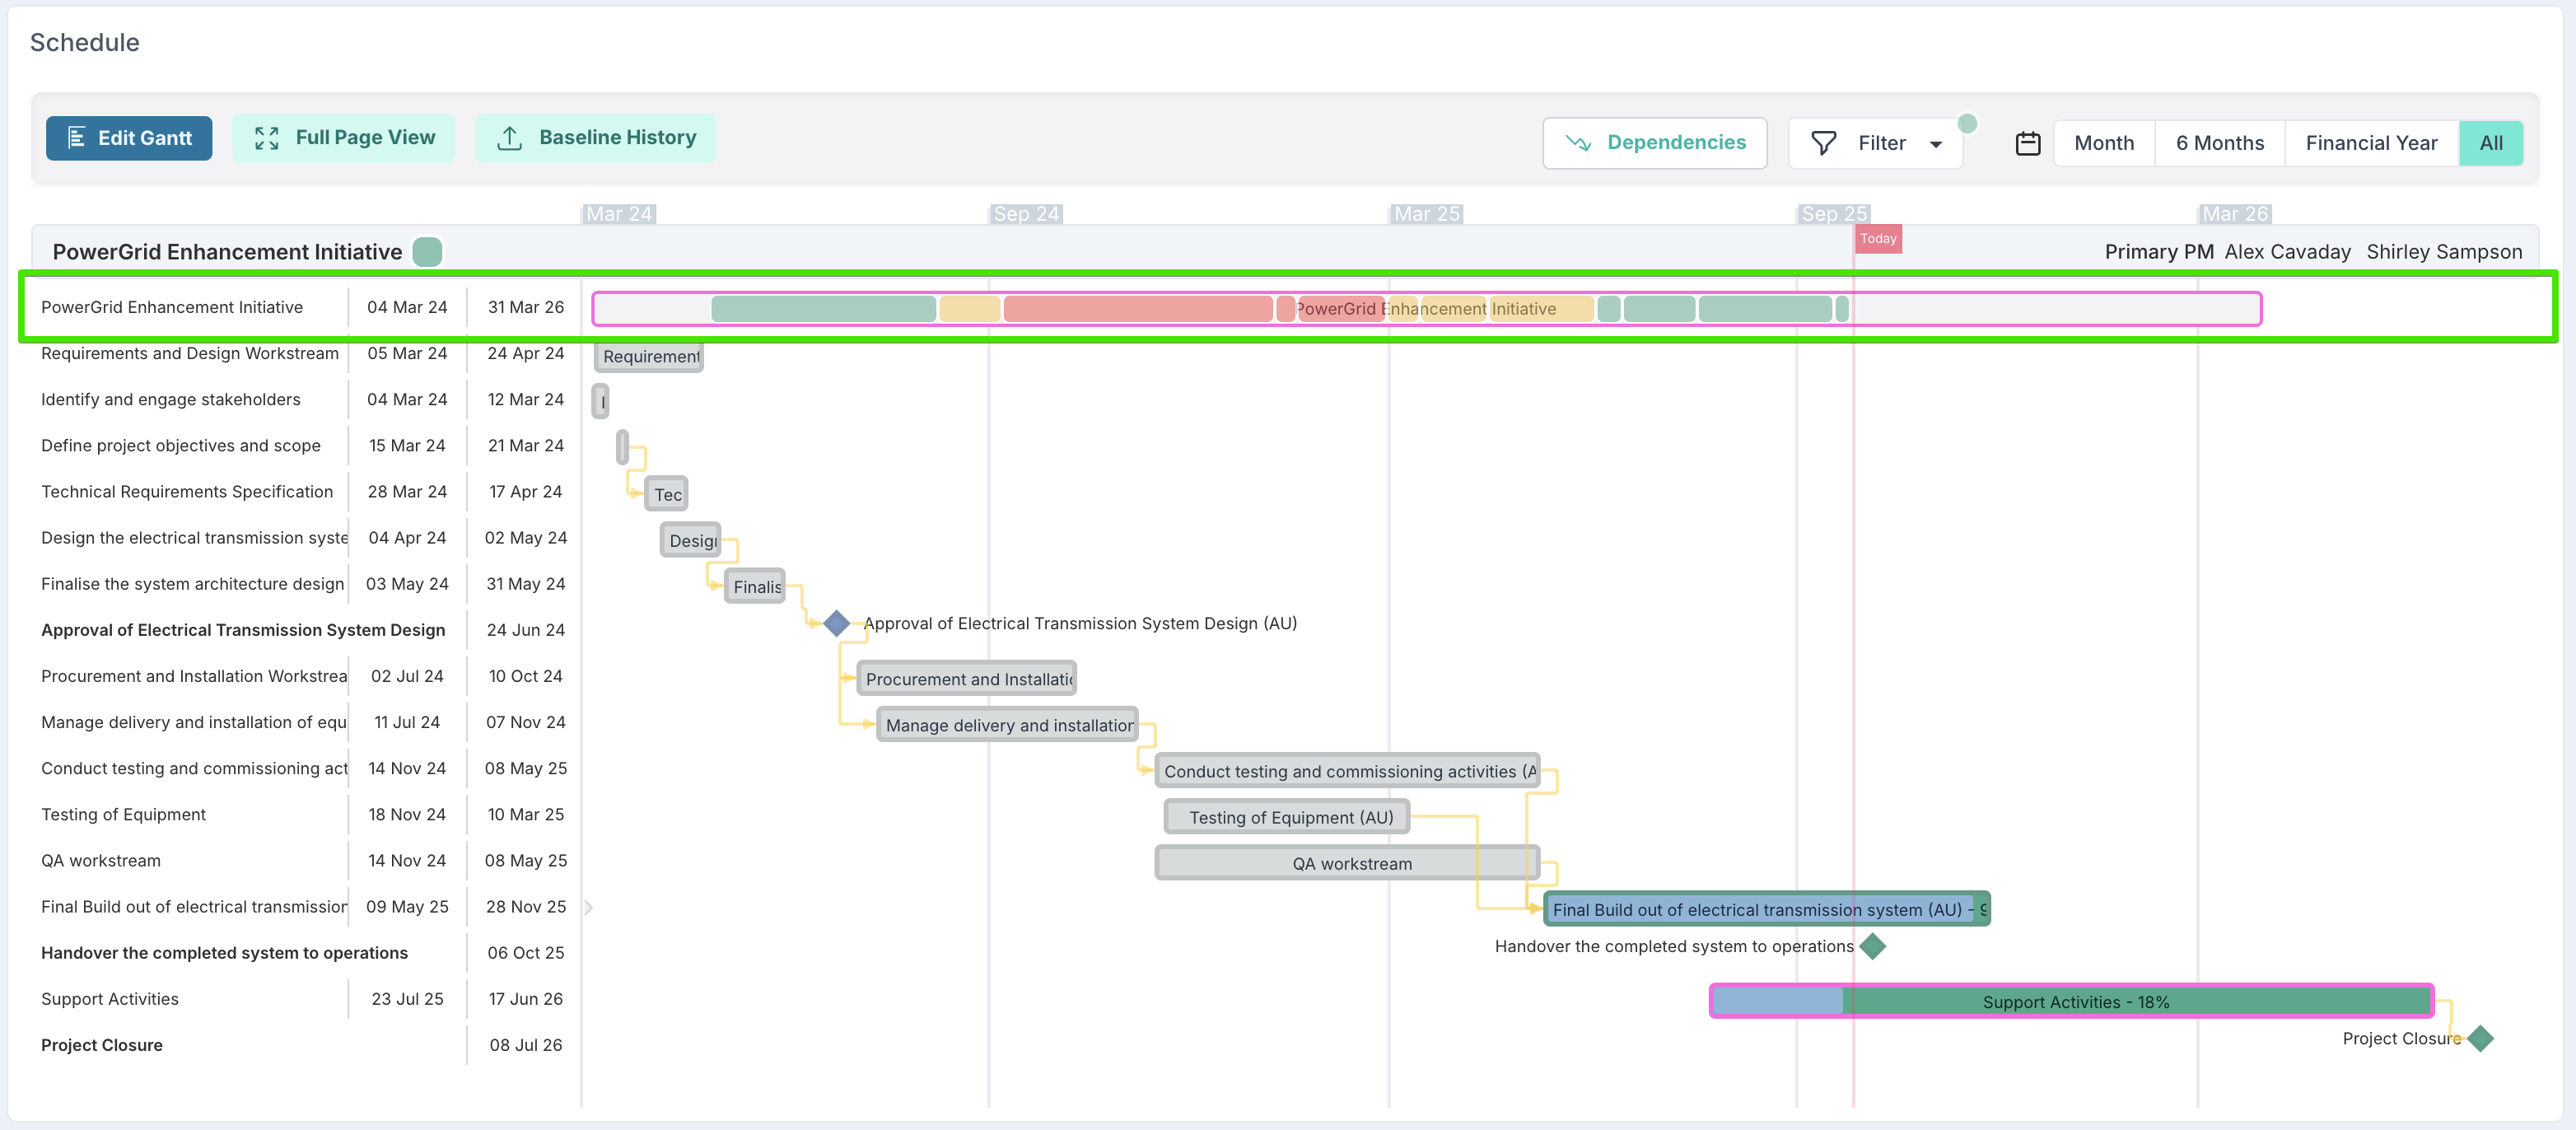
Status Reports Through Time
At the top of every project schedule, you will see a timeline showing how the project status has evolved, with each coloured segment representing a status update e.g. green, amber, red. This gives PMs and stakeholders insight into how the project has performed during its lifetime,
The coloured status history is displayed directly above the tasks, so you can see shifts in project health alongside the schedule itself.
On project dashboards, you can quickly spot which projects were at risk and have since recovered, and which have slipped further into red. This makes it easy for PMs, portfolio managers and executive stakeholders to understand not only the current state of delivery, but also the path the project has taken to get there.
Baseline History Playback
The Playback feature allows step‑through or animated progression of baseline changes, enabling teams to visualise how the schedule changed over time and to narrate the story of delivery to stakeholders.

You can use the Previous/Next buttons to manually step through baselines, or click Play to animate them in sequence. As the playback runs, tasks move live on the schedule, so you can watch how the plan has shifted baseline by baseline.
Managing Baselines with Schedule Bulk Edit
When you download the Schedule Bulk Edit file, any existing baseline dates will be included where they exist for tasks.
✅ If you are a Project Administrator, you can use Bulk Edit to update or correct baseline dates.
❌ However, if no baseline exists already for a given task, you cannot use Bulk Edit to create new baseline dates where none exist.
This ensures that baseline creation remains controlled within the application itself, while allowing project administrators to correct baseline information safely via Bulk Edit.
How to Update Baselines Using Bulk Edit
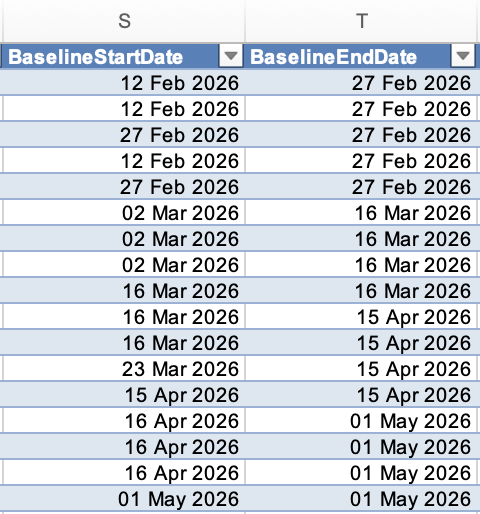
To update the baselines via Bulk Edit where one already exists, you should change the 'BaselineStartDate' and 'BaselineEndDate' values for the task in the file and re-uploaded when you have saved the changes to the file.
For more information on updating schedules via bulk edit, including detailed steps, please visit: Project Schedule Bulk Edit
Ongoing Monitoring and Adjustments
As the project progresses and evolves, you may need to re‑plan or reprioritise certain tasks to keep delivery on track. Re‑baselining when these changes occur helps maintain an accurate picture of the project’s status and aids effective and prompt decision making.
By comparing baseline dates to actual dates across the lifecycle of the project, project managers gain meaningful insight into how the schedule is shifting over time.This historical context, combined with variance analysis and status history, creates a clear, continuous narrative of delivery progress, supporting more informed decision‑making, stronger performance reporting, and more accurate forecasting for future planning.
Permissions
Project Managers can baseline schedules by default. Administrators can restrict this via project feature settings when stronger governance controls are required.
To do this:
Click your profile icon and navigate to the Administration Console > Setup Project Features.
Click Schedule in the left hand list or scroll down the page until you find the 'Schedule' section.
Here you can change the enable and disable the 'Enable Project Mangers Baseline' feature.
If you need to restrict the ability for PMs to baseline their schedule plans, then switch this off and click the Save button at the top of the page.

Conclusion
Understanding and using baselines effectively is a fundamental aspect of project management. By setting, monitoring, and adjusting baselines, project managers can ensure that their projects stay on track, meet deadlines, and achieve their objectives.