Setting up Catalogs
A Catalog defines the category of organisational items you want to manage in Fluid (e.g., Applications, Offices, Vendors, KPIs). Each Catalog Type has its own structure, attributes, and lifecycle rules. Setting them up correctly ensures your catalogs provide consistent, reusable information across projects, resources, boards, and meetings.
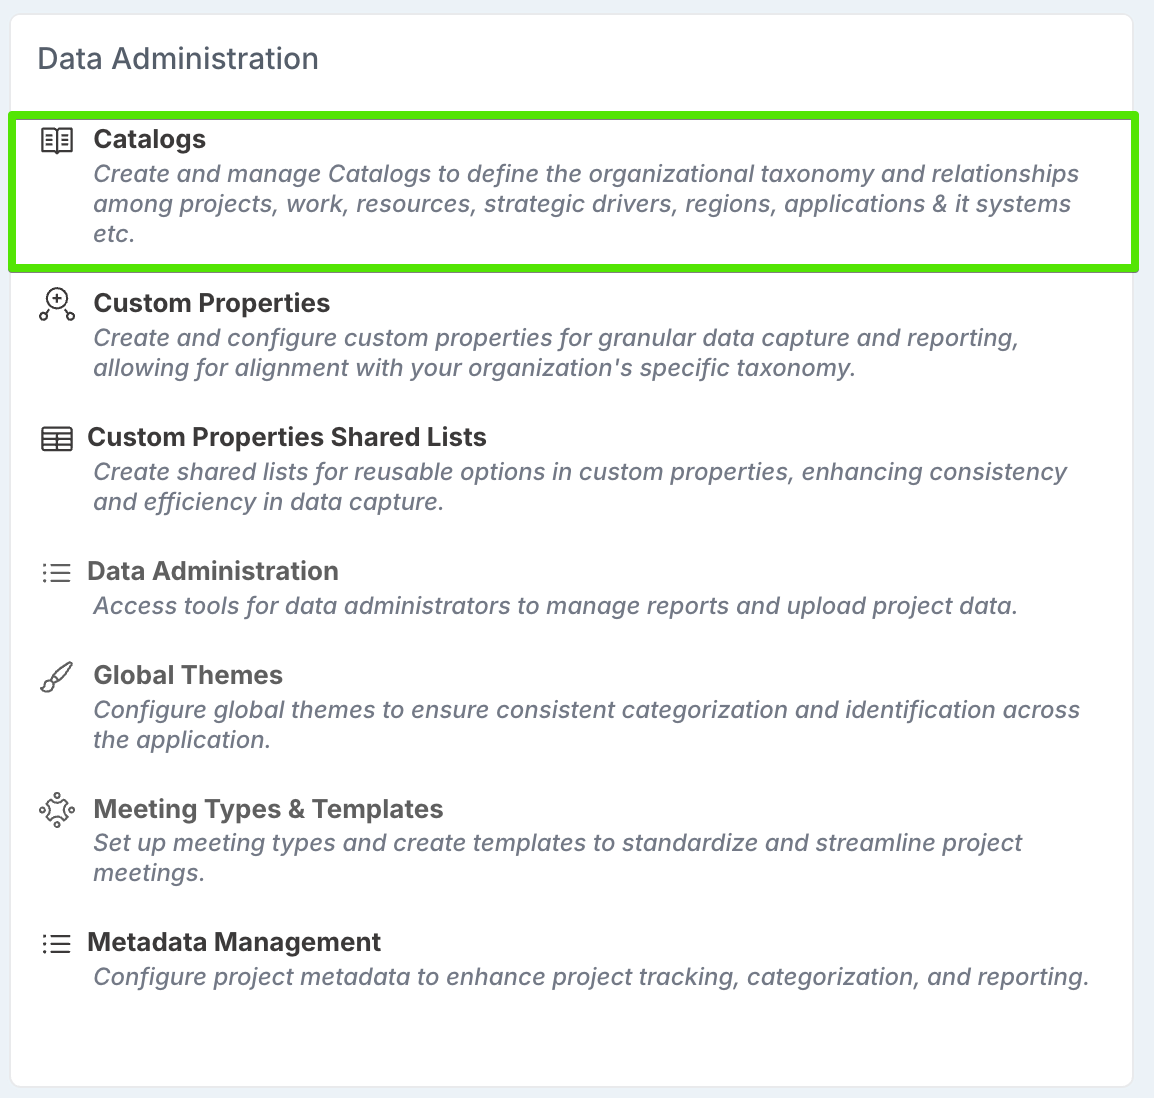
Only Administrators can create and manage catalogs. They do this from the Administration Console → Data Administration → Catalogs page.
How catalogs are set up
Setting up catalogs involves three key steps:
Create the Catalog Type – define the name and basic setup of the catalog (e.g., Business Applications, Office Locations, Strategic Drivers).
Define custom properties – add the structured attributes that every catalog item of this type will hold (e.g., licence dates, owner, region, risk rating).
Add catalog values (Catalog Items) – populate the catalog with the actual entries (e.g., specific applications, offices, vendors, KPIs).
Once set up, catalogs are available for use across Fluid as custom properties. This means they can be tagged to Projects, Scheduled Tasks, Impacts, Boards, or Resources. In the case of Impacts, catalogs can also be assigned as the owner or as a dependency.
Add a new Catalog record
Open the Catalogs page
From the Administration Console, go to Data Administration → Catalog Types.
Add a new Catalog
Click Add Item to add a new catalog record.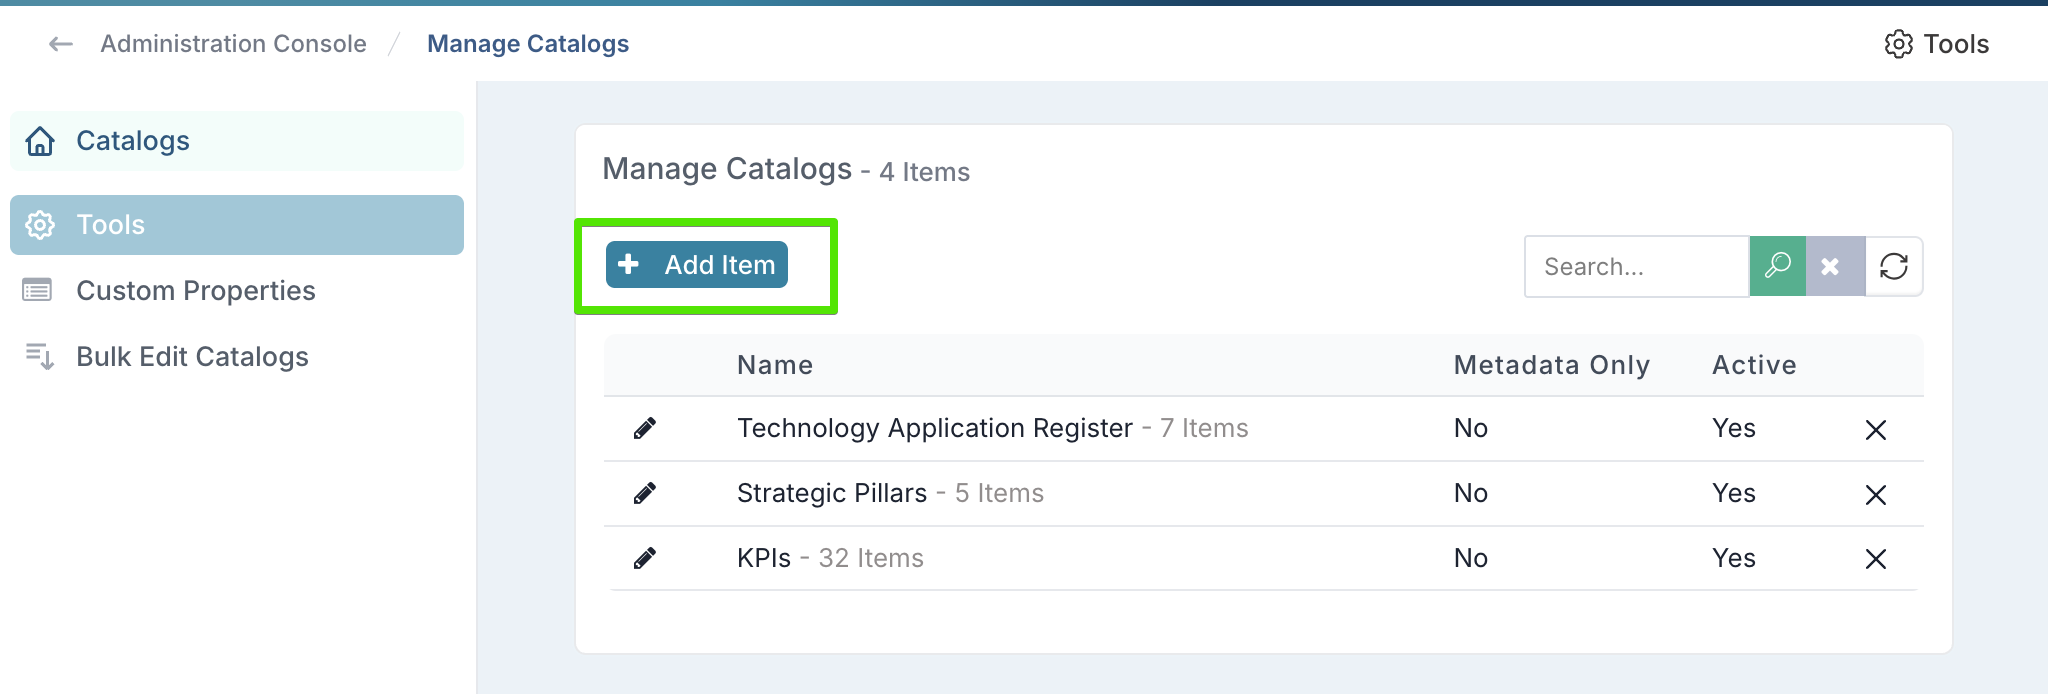
Give the catalog a clear, descriptive name (e.g., Business Applications, Office Locations, Strategic Drivers).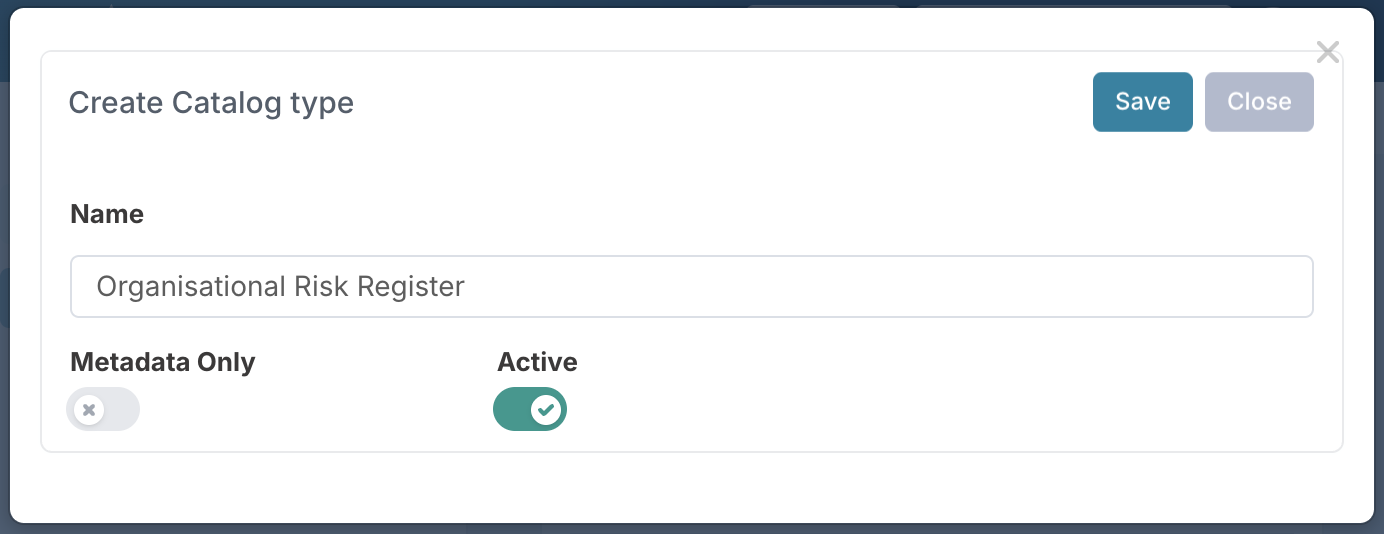
Catalogs can always be used as metadata to tag Projects, Scheduled Tasks, Impacts, Boards, Resources, etc. The Metadata Only flag controls whether a catalog can also be assigned within Impacts:If set to Yes – The catalog is metadata-only. It can be tagged and reported on but cannot be selected as an owner or dependency of an Impact.
If set to No – The catalog can be used both as metadata and as an assignable option in Impacts (e.g., as the Impact owner or as a dependency).
The Active flag indicates whether the catalog can be used. Inactive catalogs remain visible in history but cannot be assigned to new records.
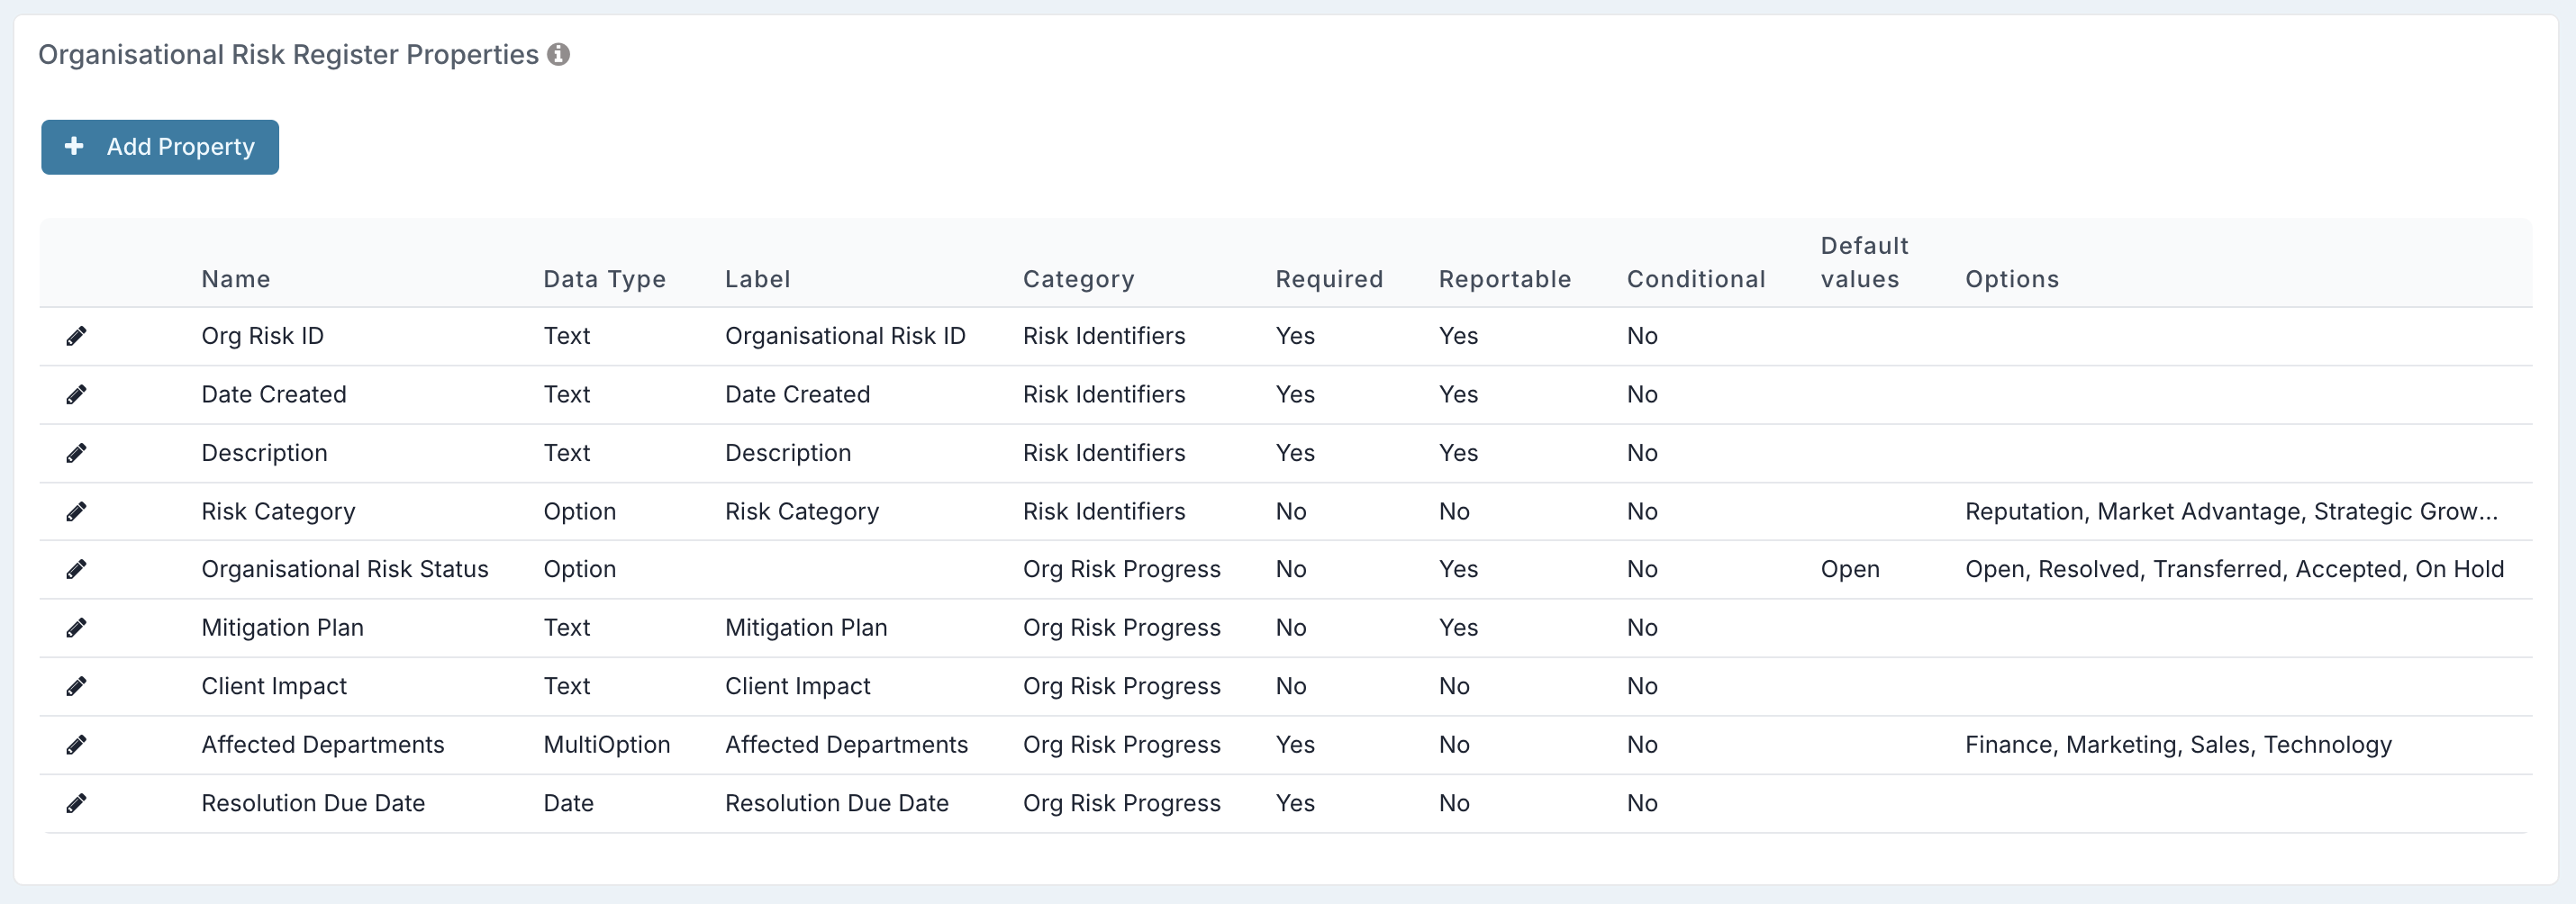
Define custom properties for the catalog
Decide what structured information you want every item in this catalog to hold. For example:
Applications: Vendor, Licence Start Date, Licence End Date, System Owner, Criticality Level
Offices: Country, Region, Site Lead, Opening Date
Vendors: Contract Dates, Risk Tier, Account Manager
These properties become the fields displayed whenever a Catalog Item from this type is referenced in projects, boards, or reports.
To set custom properties:
Select Custom Properties from the left navigation menu of the Catalog page.
Choose the catalog you want to configure.

Add the required properties.
You can read more about custom properties here.
Add Catalog values
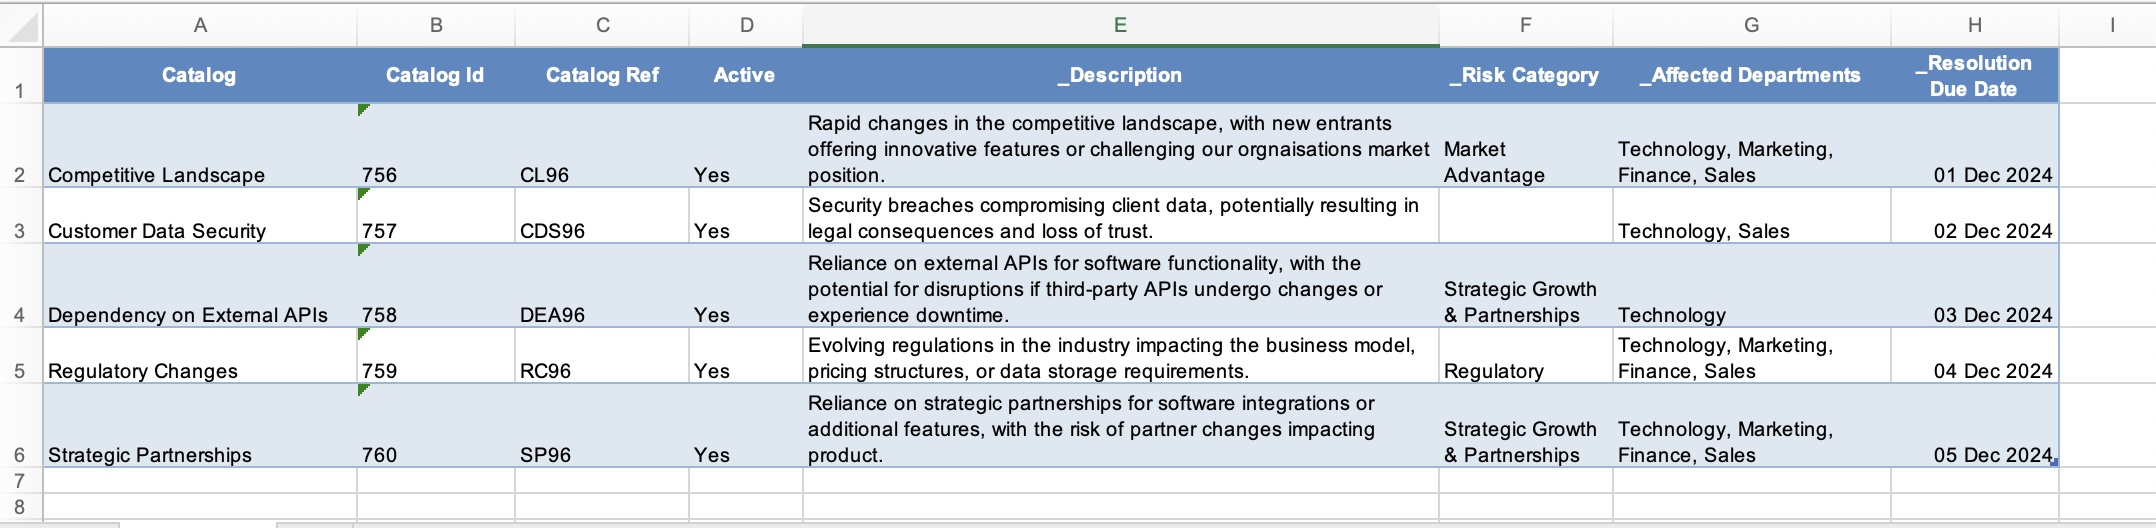
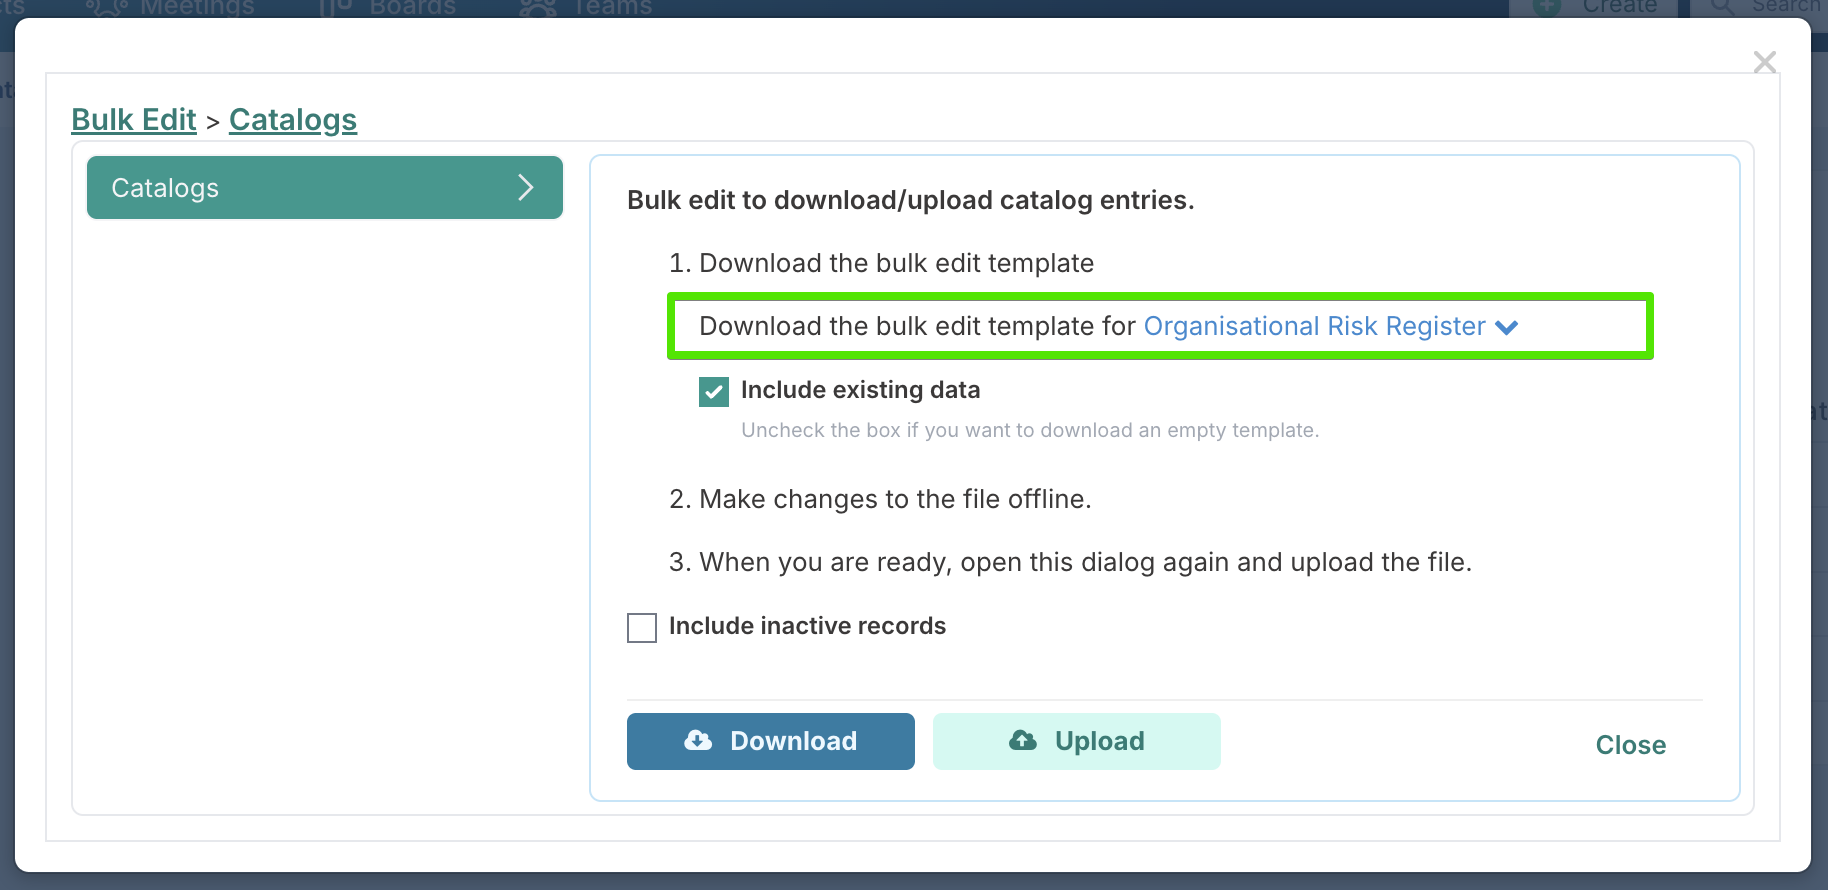
Catalog values (the individual items) are created and updated using the Bulk Edit functionality.
From the Catalog page, select Bulk Edit Catalogs from the left navigation menu.
Download the bulk edit template for the catalog you want to populate.
Update the file with new values.
Upload the updated file back into Fluid.
Data File Column Description
Column & Title | Description | What happens if this field is left blank? |
A. Catalog | The catalog value. | Mandatory – if blank, the row will be skipped. |
B. Catalog Id | The unique Fluid ID for the catalog value. Leave the catalog Id value blank when creating a new catalog value. | Fluid generates the ID. |
C. Catalog Ref | The reference code for the catalog value. | Fluid generates the reference. |
D. Active | Whether the catalog value is active or inactive. | Defaults to Yes. |
E. Custom property columns onwards | Custom properties associated with the catalog. | No value will be set. |