
Fluid Okta SSO - SAML 2.0
The instructions will link Okta with your Fluid instance. This will authenticate your Fluid logins against Okta. They however will also work with SAML services such as Google Workspaces and Ping.
Please follow the instructions below to setup SAML.
Okta Configuration Steps
In Okta, select the Sign On tab for the Fluid App
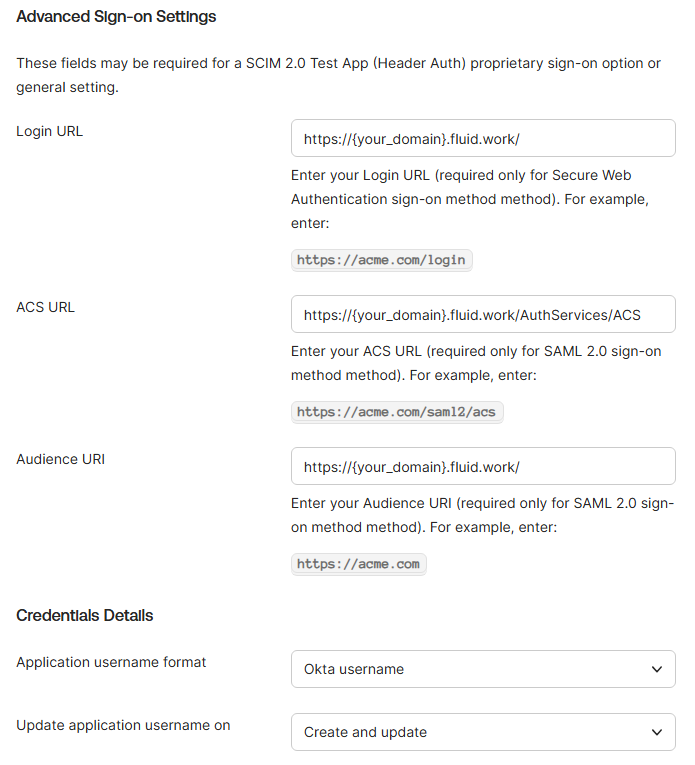
Under Advanced Sign-On Settings, populated the Login URL, ACS URL and Audience URI
Replace {your_domain) with the domain of your Fluid Instance
, go to Sign on methods > SAML 2.0 > Metadata details, and then locate and copy your Metadata URL and keep a copy of the URL.
Open the URL in a browser and take note of the entityID, you will need this when configuring Fluid.

Fluid Configuration Steps
Within your Fluid instance, click the “Administration Console” from the top right drop down menu. Then click “Authentication Providers”

Turn “Allow Saml Authentication” to “Yes”.
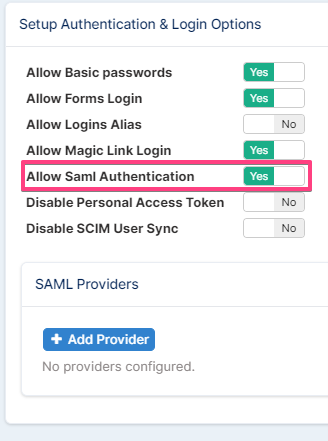
Click “Add Provider”
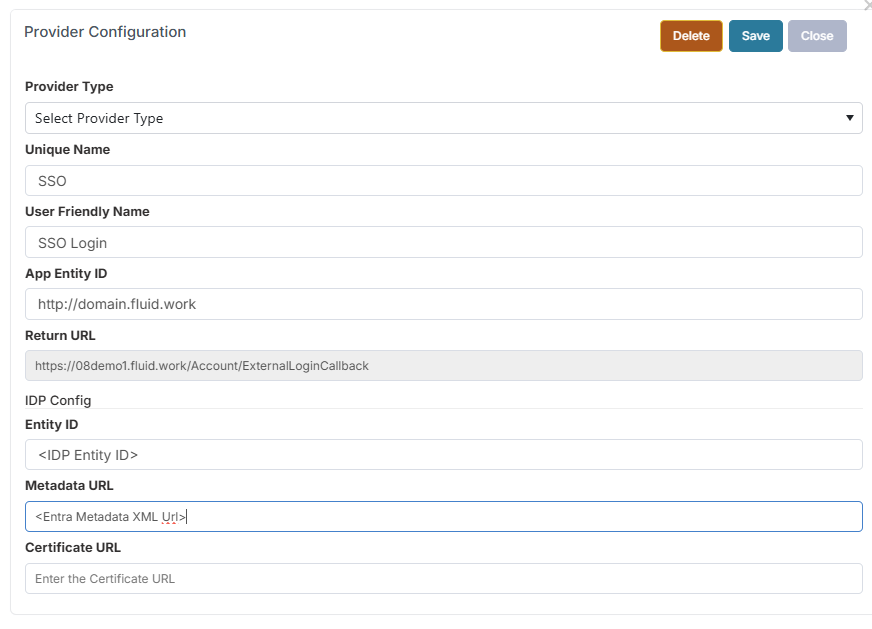
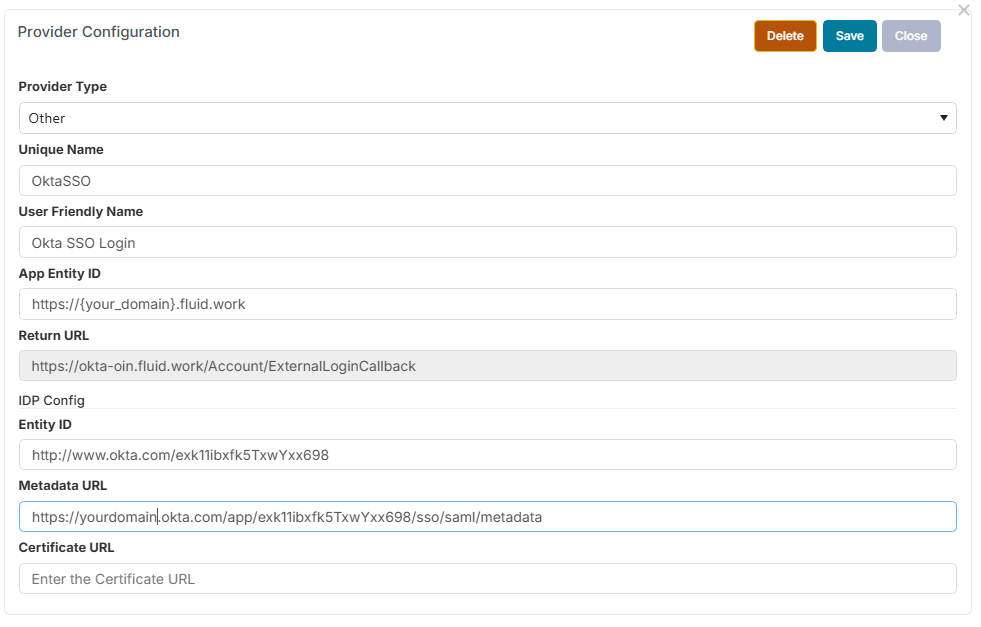
Choose “Other” from the dropdown and enter a unique name (alphanumeric with no spaces) e.g. "OktaSSO"
Type a friendly name such as “Okta SSO” in the Name field. This is seen by your end users on the Fluid Login Page.
For App Entity Id, "https://{your_domain.fluid.work".
For Entity ID, copy and paste the earlier value you noted from Okta, when browsing to the contents of the metadata url.
For the Federation metadata url, take the URL you noted from the Okta steps earlier and paste here.
Click Save and then Click “Save And Apply Settings” to save the changes and restart the Fluid Application with the new settings. Note: This button also restarts the website and can take a few minutes. During this time users will not be able to access the Fluid instance.