This guide provides instructions for copying data between Fluid sites.
The sections in the article are numbered as a guide, as some data will have dependencies on others. You can go back at any time and amend the data, but this method maintains any existing data links, without the need to do this.
For example, the 'Project Details' file will likely contain assigned PMs, so it makes sense to upload your 'Resource Plan', which contains the assignee details, before your 'Project Details' file, if you haven't already or you will need to go back and reassign the PMs later once their profile has been created in the site.
Therefore, if you're copying multiple sets of data, it's recommended to follow the order listed, skipping sections you don't require.
Data Administration
Security Roles: You must be a Data Administrator or Application Administrator.
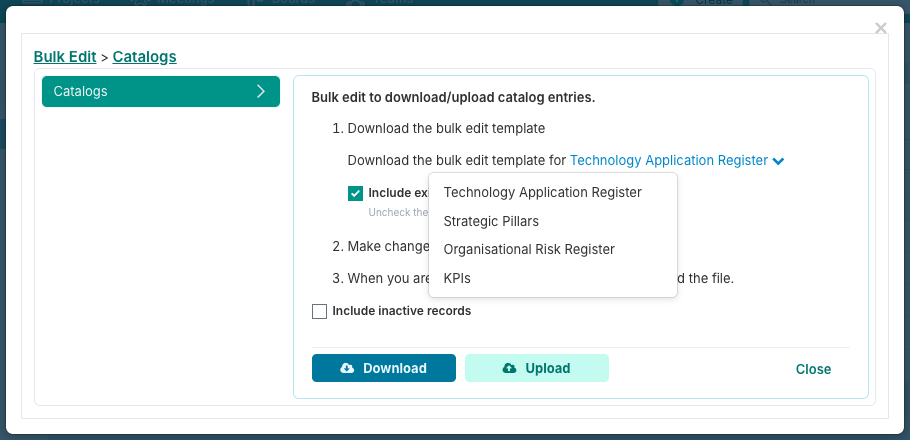
1. Catalogs
Note: If you are copying Catalogs from one site to another, we recommend to create the Catalogs before the custom properties as the Catalogs are listed as a 'Data Type' when creating a Custom Property that utilises a Catalog in Fluid.
Step | Instructions |
Download from Sandbox | Location: Administration Console > Catalogs Instructions:
|
Prepare the File |
|
Upload to Production | Instructions:
|
2. Custom Properties
Prerequisites: If you are copying Catalogs from one site to another, we recommend to create the Catalogs before the custom properties as the Catalogs are listed as a 'Data Type' when creating a Custom Property that utilises a Catalog in Fluid.
It's important to set up your custom properties before migrating any other bulk edit files as many of these will utilise custom properties, including the Project Details.
Step | Instructions |
Locate in Sandbox | Location: Administration Console > Custom Properties |
Replicate in Production | You will need to manually recreate the custom properties you want to use into your production site with the exception of Project Properties.
For the other custom property types, you can follow the steps in this article: Setting Up Custom Properties. |
3. Custom Properties Shared List
It is recommended to set up your custom properties shared lists before migrating any of your bulk edit files as many of these will utilise shared lists.
Step | Instructions |
Locate in Sandbox | Location: Administration Console > Custom Properties Shared List |
Replicate in Production | You will need to manually recreate the custom properties you want to use into your production site. You can follow the steps in this article: Setting Up Custom Property Shared Lists. |
4. Global Themes
Step | Instructions |
Download from Sandbox | Location: Administration Console > Global Themes Instructions:
|
Prepare the File |
|
Upload to Production | Instructions:
|
5. Metadata Management
It's advised to migrate your metadata before migrating resources, projects and project data, as the metadata is used in these areas.
Step | Instructions |
Download from Sandbox | Location: Administration Console > Metadata Management Instructions:
|
Prepare the File |
|
Upload to Production | Instructions:
|
Financials & Timesheets
Security Roles: You must be a Financial Administrator or Application Administrator.
6. Currency Management
Currency is used in the rate cards so it's advisable to upload currencies before rate cards.
Step | Instructions |
Download from Sandbox | Location: Financial Administration > Currency Management Instructions:
|
Prepare the File |
|
Upload to Production | Instructions:
|
7. Expense Types
Expense Categories and Expense Types are also used in the rate cards (those of Class 'Resource'), therefore it's advised to migrate the expense categories and types before migrating the rate cards.
Step | Instructions |
Download from Sandbox | Location: Financial Administration > Expense Types Instructions:
|
Prepare the File |
|
Upload to Production | Instructions:
|
8. Rate Cards
Prerequisites: Currency Management and Expense Types are used by the Rate Cards.
Step | Instructions |
Download from Sandbox | Location: Administration Console > Rate Card Management Instructions:
|
Prepare the File |
|
Upload to Production | Instructions:
|
User Management
Security Roles: You must be a User Administrator or Application Administrator.
9. Resource Labels and Field Names
Location: Administration Console > Resource Labels and Field Names

Instructions: Locate in Sandbox and Production and update any field names you have customised and wish to mirror in Production.
10. Division, Department and Team
Step | Instructions |
Download from Sandbox | Location: Administration Console > Division, Department and Team  Instructions:
|
Prepare the File |
|
Upload to Production | Instructions:
|
11. Manage Resource Plans
This includes Resources / User Profiles & Placeholders.
Prerequisites: Division, Department and Teams, Resource Labels and Field Names (if labels and field names have been changed)
Step | Instructions |
Download from Sandbox | Location: User Management Financial administrators with a 'User Administration' role can find this functionality on the 'Financial Administration' page too. Instructions:
|
Prepare the File |
|
Upload to Production | Instructions:
|
Project Settings
Security Roles: You must be a Project Administrator or Application Administrator.
12. Project Labels & Field Names
Location: Administration Console > (Project Settings) Project Labels & Field Names

Instructions: Locate in Sandbox and Production and update any field names you have customised and wish to mirror in Production.
Note that in this section, you not only update the project labels, but the controls for your Status Report settings, Project Impacts settings and global Default Dashboard page (Default Watchlist Page) are also set here so please check these.
You can read more here: Project Labels & Field Names.
13. Setup Project Features
Location: Administration Console > (Project Settings) Setup Project Features

Instructions: Align settings from Sandbox to Production and click 'Save'.
14. Project Templates
Step | Instructions |
Download from Sandbox | Location: Administration Console > (Project Settings) Project Templates Instructions: You will need to do this for each project template that you want to migrate from Sandbox to production.
|
Prepare the File |
|
Upload to Production | Instructions: You will need to do this for each project template that you want to migrate from Sandbox to production.
|
15. Impact, Probability and Risk Rating
Administration Console > (Project Settings) Impact, Probability and Risk Rating

Instructions: Configure your impact, probability and risk rating in production to match your sandbox settings.
You can read more here: Impact, Probability & Risk Rating Configuration
16. Methodologies, Phases and Stage Gates
Projects will use these so it's recommended to migrate the methodologies, phases and stage gates before uploading projects if you want the project to maintain the links with these.
Step | Instructions |
Download from Sandbox | Location: Administration Console > (Project Settings) Methodologies, Phases and Stage Gates Note: if Stage Gates are not turned on, the link will be shown as 'Methodologies, Phases, and Tasks'. Instructions:
|
Prepare the File |
|
Upload to Production | Instructions:
|
17. Project Types
Projects will use these so it's recommended to migrate the Project Types before uploading projects if you want the project to maintain the links with these.
Step | Instructions |
Download from Sandbox | Location: Administration Console > (Project Settings) Project Types  Instructions:
|
Prepare the File |
|
Upload to Production | Instructions:
|
18. Portfolios and SubPortfolios
Projects will use these so it's recommended to migrate the portfolios and subportfolios before uploading projects if you want the project to maintain the links with these.
Prerequisites: If you have portfolio or subportfolio administrators, approvers, viewers assigned, then it makes sense to have imported your resource plans (which includes your resource profiles).
If you have not, you can come back and re-assign the administrators, approvers and viewers later when you have created the users in the system.
Step | Instructions |
Download from Sandbox | Location: Administration Console > (Project Settings) Portfolio and SubPortfolios Instructions:
|
Prepare the File |
|
Upload to Production | Instructions:
|
19. Tier and Business Drivers
Projects will use these so it's recommended to migrate the Tier and Business Drivers before uploading projects if you want the project to maintain the links with these.
Step | Instructions |
Download from Sandbox | Location: Administration Console > (Project Settings) Tier and Business Drivers Instructions:
|
Prepare the File |
|
Upload to Production | Instructions:
|
Projects
Security Roles: Only users with Financial Administrator and Data Administrator roles on their account can download and upload project details. Users with only Financial Administrator role only can download the project details file but cannot upload it.
20. Project Details
Prerequisites: Resource Plans, Catalogs, Custom Properties (Project), Custom Property Shared Lists, Metadata, Global Themes, Project Labels & Field Names, Setup Project Features, Methodologies, Phases and Stage Gates, Project Types, Portfolio and SubPortfolios, Tier and Business Drivers.
Step | Instructions |
Download from Sandbox | Location: Data Administration > Project Details (Download) Instructions: Instructions:
|
Prepare the File |
|
Upload to Production | Location: Data Administration > Project Details (Upload) Instructions:
OR Location: Projects (Top Navigation) > Tools > Bulk Edit Instructions:
|
21. Schedules
Prerequisites: Metadata, projects (Project Details) and Resource Plans to link any task assignees.
File: Schedule Tasks
Step | Instructions |
Download from Sandbox | Location: Projects (Top Navigation) > Tools > Bulk Edit Instructions:
|
Prepare the File |
|
Upload to Production | Instructions:
|
23. Project Impacts
Prerequisites: Project Labels & Field Names (Project Impacts) , project s(Project Details) and Resource Plans for maintaining impact assignees.
Step | Instructions |
Download from Sandbox | Location: Projects (Top Navigation) > Tools > Bulk Edit Instructions:
|
Prepare the File |
|
Upload to Production | Instructions:
|
24. Status Reports
Prerequisites: Custom Properties, Metadata (RAGs and Component RAGs), projects (Project Details), Resource Plans as the project statuses use assignees to establish owners and Impacts, to maintain any linked impacts.
These instructions step you through how to import the latest project status report for each of the projects. There are instructions for uploading historic status reports on a project by project basis below the first table.
Step | Instructions |
Download from Sandbox | Location: Project Dashboards (Click the 'Projects' button in the top navigation bar. Instructions:
|
Prepare the File |
|
Upload to Production | Instructions:
|
To add the historic project status reports to an individual project:
Step | Instructions |
Download from Sandbox | Location: Project Workspace Instructions:
|
Prepare the File |
|
Upload to Production | Instructions:
|
Resource Forecasts
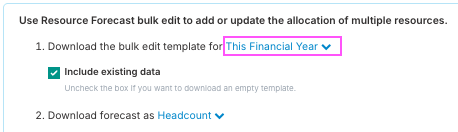
25. Resource Forecasts
Prerequisites: Metadata Management, Rate Cards, Resource Labels & Field Names, Resource Plans, Project Details.
File: Resource Forecasts
Step | Instructions |
Download from Sandbox | Location: Project Dashboards (Click the 'Projects' button in the top navigation bar. Instructions:
|
Prepare the File |
|
Upload to Production | Instructions:
|
Project Financials
Security Roles: You must be a Financial Administrator or Application Administrator.
26. Baseline Forecasts
Prerequisites: MetaData Management, Project Details, Currencies, Expense Categories and Types, Resource Plans.
File: Baseline Forecast
Step | Instructions |
Download from Sandbox | Location: Project Dashboards (Click the 'Projects' button in the top navigation bar. Instructions:
|
Prepare the File |
|
Upload to Production | Instructions:
|

27. Project Benefits
Prerequisites: MetaData Management, Project Details, Currencies, Expense Categories and Types, Resource Plans.
Files: Project Benefits (Fluid Benefits-qualitative, Fluid Benefits-quantitative, Fluid Benefits-quantitativeNonResourcing)
Step | Instructions |
Download from Sandbox | Location: Project Dashboards (Click the 'Projects' button in the top navigation bar. Instructions:
|
Prepare the File |
|
Upload to Production | Instructions:
|
Project Dashboards and Reporting Templates
Reporting Templates
Location: Administration Console > Reporting Templates
You can download your custom reports and uploaded them to another site for use.
Troubleshooting
Bulk File: Skipped Rows or Didn't Upload the Data
When your file uploads, the dialogue will list any issues encountered. It will display the row number from the spreadsheet, and the reason why it skipped the row. You can use this to diagnose any issues with your data.
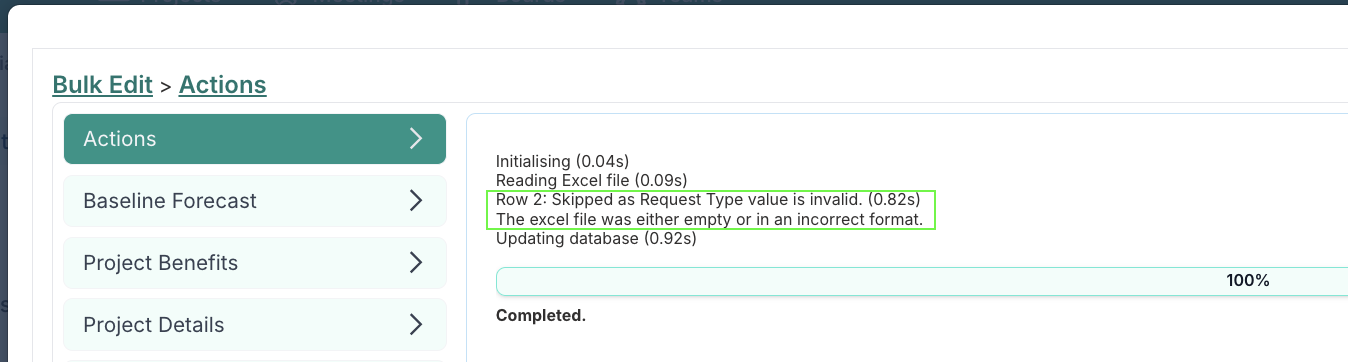
To rectify any issues with the data for any skipped rows, in most cases, you can reopen the file you uploaded, make the necessary updates, save and re-upload the file.
Important Note: If the file rows use GUIDs, please remember not to re-upload the file with the lines that did successfully upload, or you may create duplicates of those items. The 'Schedule Tasks' file is an example of this.
In cases where some rows have not uploaded, and the rows use GUIDs, you should remove any lines that you have confirmed did upload from the file in order to not create those items again.