Microsoft Project plans often carry information in custom fields - a workstream, a supplier, an estimated cost, a sign-off date. Fluid reads those fields when you upload a plan and writes them back when you download one, so the information travels with the plan instead of being retyped. There is nothing to map by hand: a field is matched to a Fluid custom property with the same name.
In this article, you will learn:
✔ How MS Project custom fields are matched to Fluid custom properties
✔ How to set up the custom properties so a plan's fields import
✔ How task-level and project-level fields are handled, on upload and on download
✔ How to read the import log, and what to do with fields that did not match
✔ The settings, permissions and limitations that apply
How matching works
In Microsoft Project a custom field has a fixed field name - Text1, Number3, Date2, Flag1 - and the name the planner gave it, shown as the column heading. Fluid uses the name the planner gave it.
A field matches a Fluid custom property when that name equals the property's Name or its Label. Capital letters, accents and extra spaces are ignored, so Sign-off date in the plan matches a property labelled Sign-off Date.
In Microsoft Project | Matched to | Where it appears in Fluid |
Task custom fields (Text, Number, Date, Flag and enterprise task fields) | Schedule custom properties | On each task, in the task dialog and as Gantt columns |
Project-level fields: Project Information > Enterprise Custom Fields, File > Info > Advanced Properties > Custom, and custom fields on the project summary task | Project custom properties | On the project, for example in the project details |
Tip: Keep a short, tidy Name on the property and put the plan's column heading in its Label. The property then matches the plan without renaming anything in either tool.
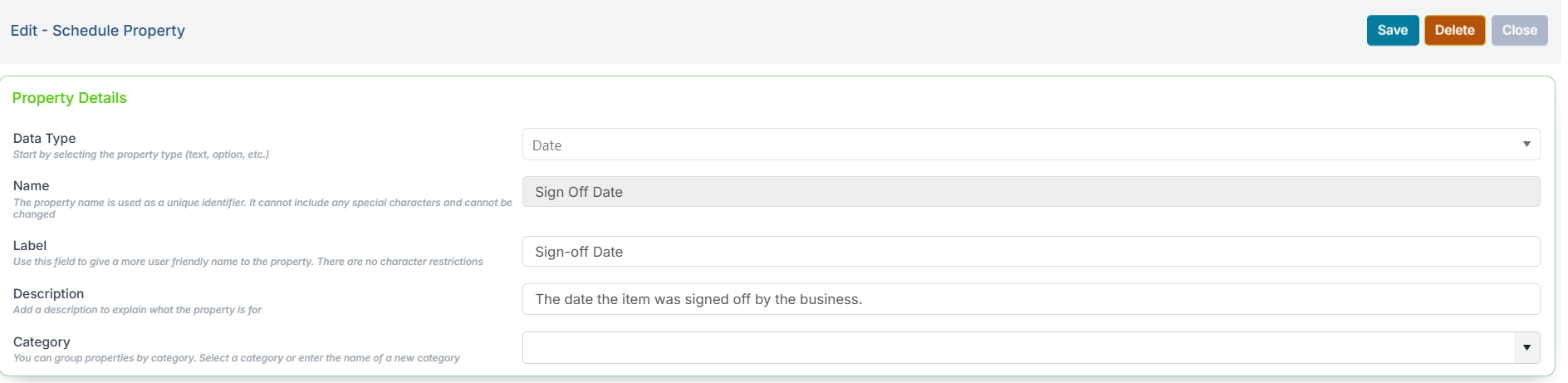
Setting up the custom properties
An administrator creates the properties once, and every later upload uses them.
Open the plan in Microsoft Project and note the custom fields you want in Fluid, and what each one holds.
In Fluid, open Administration Console > Custom Properties and choose the Schedule Properties for task fields, or the project properties for project-level fields.
Click Add Property for each field. Choose a data type that suits the values, and give the property a Name or Label that matches the field's name in the plan.
For an option list, add every value the plan uses. A value that is not in the list is not imported.

Fluid property type | Takes values from |
Text | Any field. The value is copied as text. |
Number | Number and cost fields. A percentage such as 52% is read as 52. |
Date | Date fields. |
Yes / No | Flag fields. |
Option list | Text fields whose values are options in the list. Matching ignores capital letters. |
Person, project, cascading option and table properties are not filled from a plan.
Uploading a plan with custom fields
Upload the plan as usual from Tools > MS Project Upload / Download - see Importing MS Project plans. In this example the plan has five task fields and two more that Fluid does not have properties for.
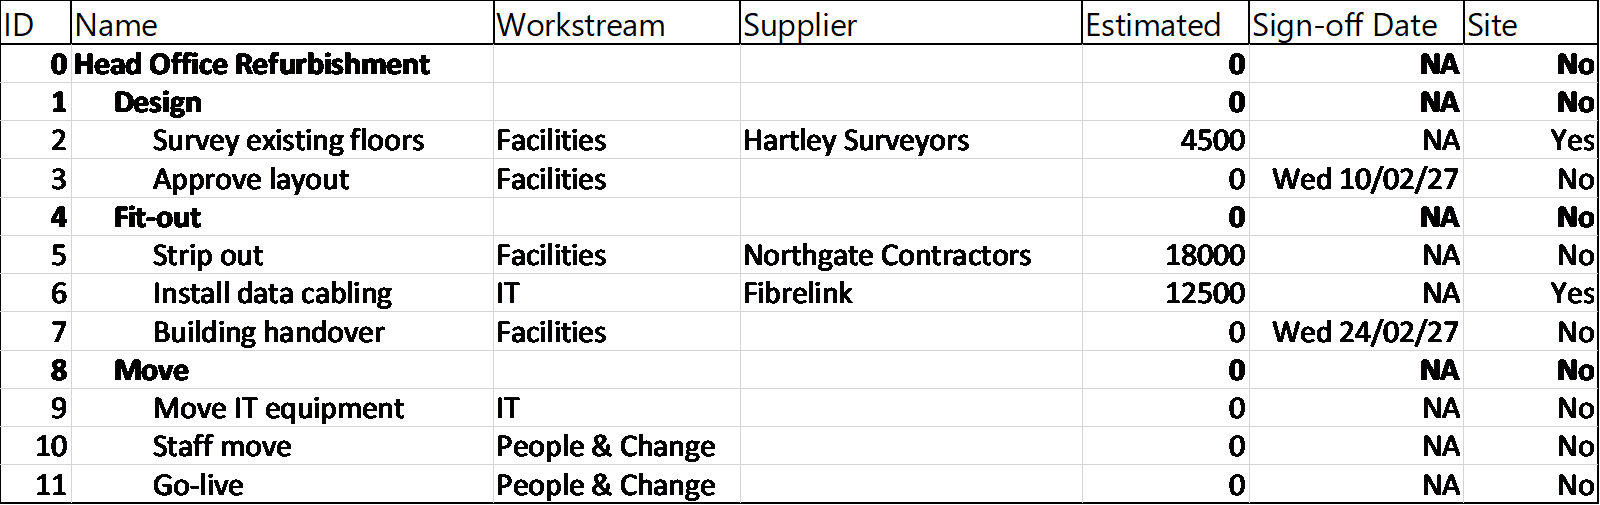
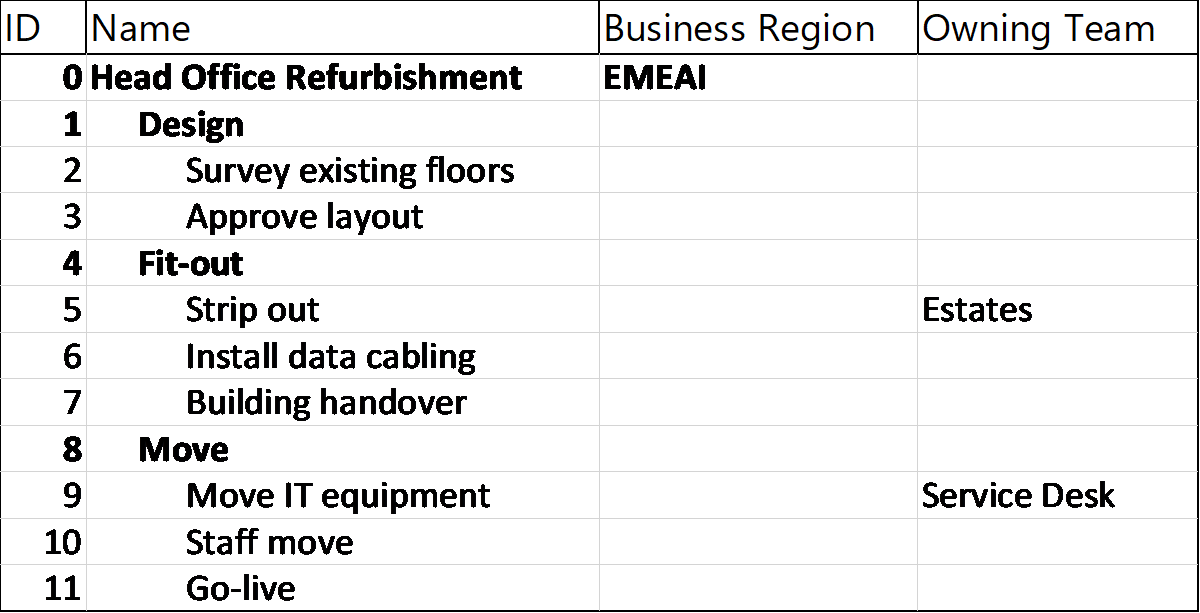
The import messages list exactly what happened to each field:
Custom fields: 5 matched a Fluid custom property - each field and the property it filled.
Custom fields in the file with no matching Fluid custom property - fields Fluid ignored. To import one, create a Schedule custom property whose Name or Label matches the field's name exactly, and upload again.
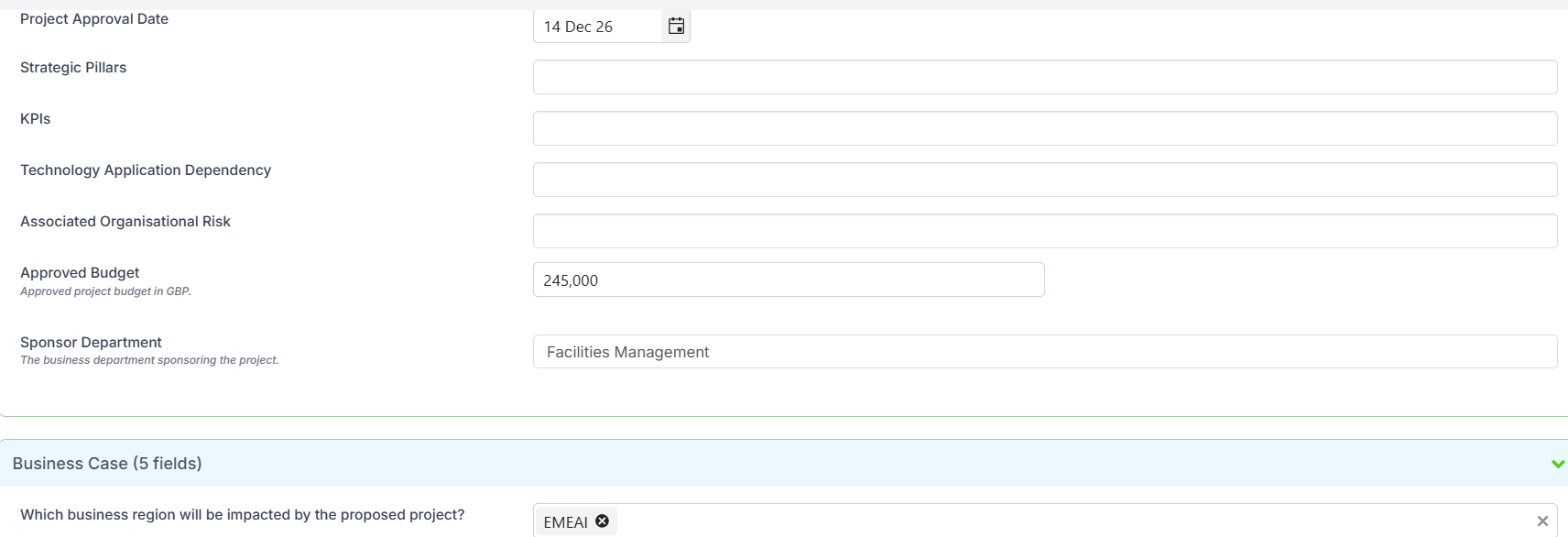
Project custom fields: 4 matched a Fluid Project custom property - the project-level fields, then the values written to the project.
Fluid Project custom properties with no matching field in the file - properties the plan says nothing about. Their values are left unchanged.


To see the imported values on the Gantt, open Columns and switch the properties on in the Custom Properties group.

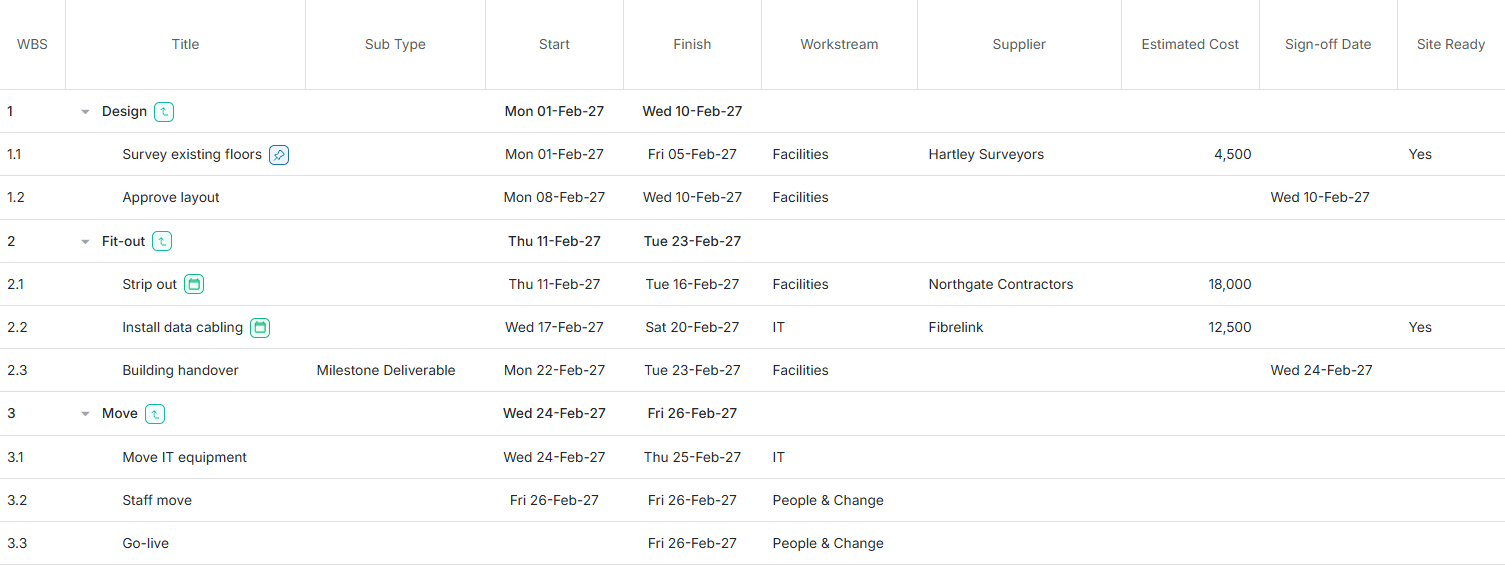
On a later upload of the same plan, each field updates the property it matched.
Downloading a plan with custom fields
An MPP download writes the schedule's custom properties into the file as Microsoft Project custom fields, named after each property's Name, so a later upload matches them again. Text, rich text, number, percentage, date, yes/no and option-list properties are written to Text, Number, Date and Flag fields. Project custom properties are written as project-level custom fields. See Exporting a Fluid Schedule to Microsoft Project (MPP Export).
Microsoft Project has a fixed number of custom fields of each kind (30 text, 20 number, 10 date and 20 flag). If a schedule has more properties of one kind than that, the extra ones are left out and named in the download messages.
Settings and permissions
MS Project upload and download need the Allow MS Project Upload feature. One more setting, in the Project Schedules group of the Administration Console feature settings, affects custom fields:
Setting | Effect |
MS Project upload / download carries Project custom properties | When on, project-level fields are imported on upload and written on download. When off, project-level fields in an upload are listed in the messages but not imported, and a download writes none. Task-level fields are not affected by this setting. |

Project-level values are written with the permissions of the person uploading: a project custom property they cannot edit is not changed.
A task field calculated by a formula imports the result Microsoft Project saved in the file - the value you see in Microsoft Project - and the messages name the fields imported that way. Where Microsoft Project saved no result for a row, Fluid works the value out from the plan's own figures, leaving inactive tasks out of summary rows as Microsoft Project does.
Project-level fields calculated by a formula, or taken from a Project Server lookup table, are listed in the messages but not imported.
Microsoft Project's own built-in properties, such as % Complete, Cost and Work, are never treated as custom fields.
Frequently asked questions
A field is listed as having no matching custom property.
Create a Schedule custom property (or a Project custom property, for a project-level field) whose Name or Label is the field's name in the plan, then upload the plan again.
A field matched but some tasks have no value.
For an option list, check that every value used in the plan exists in the property's list. For a number or date, check that the plan's value is a number or a date.
The values imported but I cannot see them on the Gantt.
Switch the properties on from Columns, in the Custom Properties group.
Can I map a field to a property with a different name?
Yes - give the property that field's name as its Label, and keep your own Name.